
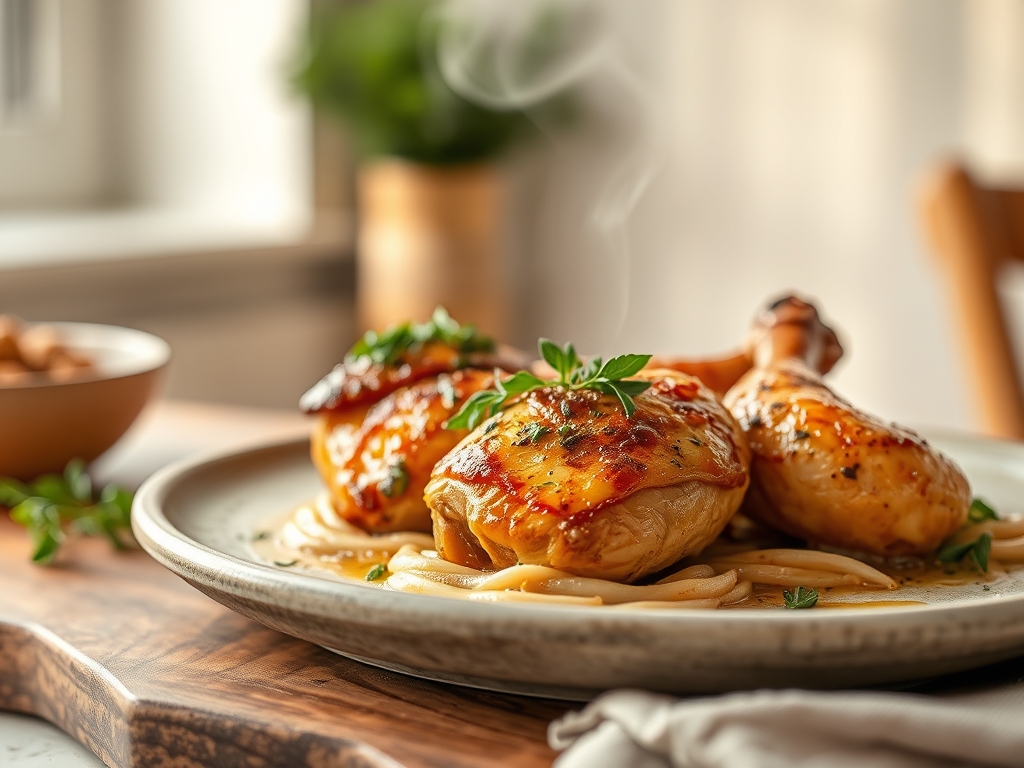
The scent of rendering schmaltz is a universal love language that translates perfectly into your kitchen. When you master baked thigh and legs chicken recipes, you are not just cooking dinner; you are orchestrating a complex chemical transformation of collagen into silky gelatin. There is a primal satisfaction in hearing that first shatter of golden, crisp skin against a fork. We are moving past the days of dry, uninspired poultry and stepping into a world where dark meat reigns supreme due to its higher fat content and structural integrity.
Dark meat is forgiving, but perfection requires precision. Unlike the lean breast, the thigh and drumstick possess a complex muscular structure that demands specific thermal treatment to reach peak tenderness. We are looking for that magical intersection where the skin achieves a glass-like finish while the meat remains glistening and succulent. Whether you are prepping for a high-octane weeknight or a slow Sunday, these techniques will elevate your repertoire. Let us dive into the mechanics of the perfect roast, ensuring every bite is a masterclass in texture and piquant flavor.
The Gathers:
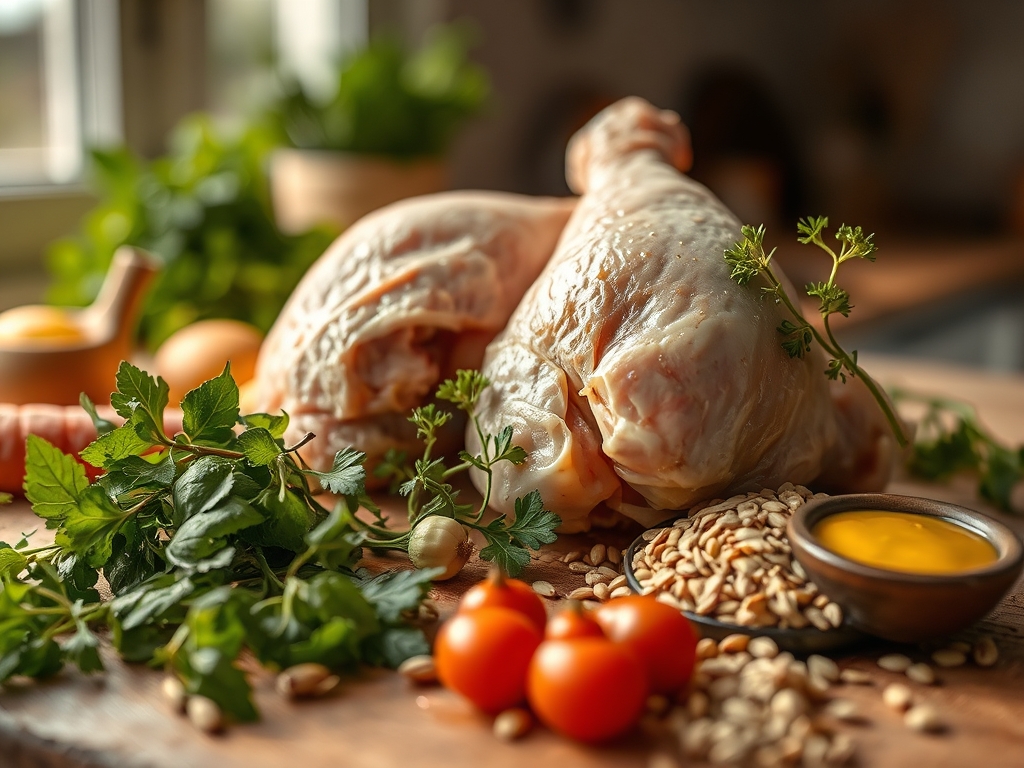
Before we ignite the flame, your mise-en-place must be impeccable. You will need high-quality bone-in, skin-on cuts. The bone acts as a thermal conductor, radiating heat from the inside out to ensure even cooking. Gather your digital scale to measure out kosher salt; its jagged crystals adhere better to the dermis than fine table salt. You will also need high-smoke-point fats like avocado oil or clarified butter to facilitate the Maillard reaction without scorching.
For the aromatics, reach for your microplane to zest lemons and grate fresh garlic into a fine paste. This increases the surface area, allowing the essential oils to infuse the fat more effectively. Your "Smart Substitutions" are vital: if you lack fresh herbs, use a 1:3 ratio of dried to fresh, but crush them in your palm first to aerate the volatile oils. If you are avoiding dairy, a viscous spoonful of tahini can mimic the richness of butter while adding a nutty depth. Always keep a heavy-bottomed skillet or a stainless steel roasting rack nearby to ensure 360-degree airflow.
The Clock
Efficiency in the kitchen is about "Chef's Flow." Total preparation time is approximately 15 minutes, with a roasting window of 35 to 45 minutes depending on the calibration of your oven. The flow begins with tempering your meat; taking the chill off for 20 minutes prevents "thermal shock," which causes muscles to contract and squeeze out moisture. While the chicken tempers, you prep your glaze in a saucier. The final 10 minutes of the process are reserved for the most critical stage: the rest. This allows the internal pressure to stabilize, ensuring the juices stay in the meat rather than flooding your cutting board.
The Masterclass
1. The Desiccation Ritual
Pat the chicken extremely dry using heavy-duty paper towels. Moisture is the enemy of crispness; any residual water will create a steam jacket around the meat, preventing the skin from reaching the 300-degree Fahrenheit threshold required for browning.
Pro Tip: This is known as surface desiccation. By removing water, you allow the heat to immediately begin the Maillard reaction, creating those complex, savory flavor compounds.
2. The Osmotic Brine
Season liberally with kosher salt at least 30 minutes before baking. Salt initially draws moisture out, but given time, it dissolves into a concentrated brine that is reabsorbed, seasoning the meat deeply and breaking down tough muscle proteins.
Pro Tip: This process is denaturation. The salt alters the protein structure so it can hold more water during the high-heat phase, resulting in a juicier final product.
3. The Lipid Barrier
Coat the skin in a thin layer of oil or melted fat. Use your hands to massage it into every crevice. This ensures the heat is distributed evenly across the irregular surface of the drumstick.
Pro Tip: Fat is a superior heat conductor compared to air. This "lipid jacket" ensures the skin fries in its own rendered fat, achieving a uniform golden hue.
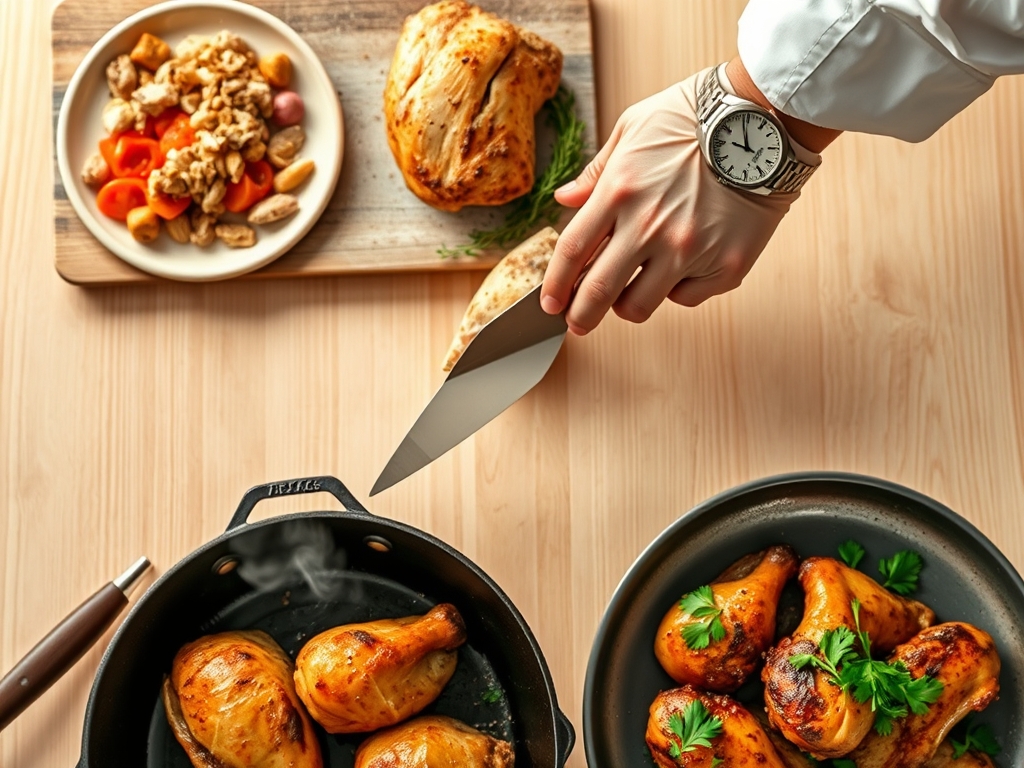
4. The Elevated Roast
Place the chicken on a wire rack set over a baking sheet. This allows hot air to circulate under the pieces, preventing the dreaded "soggy bottom" that occurs when meat sits in its own exuded juices.
Pro Tip: Convection heat is more efficient than radiant heat. Elevating the meat increases the surface area exposed to moving air, accelerating the rendering of subcutaneous fat.
5. The Thermal Spike
Start your oven high, around 425 degrees Fahrenheit. High initial heat causes the skin to contract and begin the crisping process immediately before the internal meat overcooks.
Pro Tip: This utilizes the principle of a "thermal gradient." A hot exterior creates a protective crust that shields the delicate interior from drying out.
6. The Aromatic Infusion
Halfway through, toss whole garlic cloves and woody herbs like rosemary into the pan. The heat will cause the fats to deglaze the brown bits (fond) on the pan, creating a flavorful base for a pan sauce.
Pro Tip: Fat-soluble flavor compounds in herbs require heat to release. This late addition prevents the delicate leaves from carbonizing and becoming bitter.
7. The Glaze Application
If using a sugary glaze (like honey or BBQ), apply it only in the last 5 to 8 minutes. Use a silicone brush to paint a thin, even layer over the drumsticks.
Pro Tip: Sugar undergoes caramelization quickly. Applying it too early leads to burning (pyrolysis) before the chicken reaches its safe internal temperature.
8. The Internal Verification
Use a digital meat thermometer to check the thickest part of the thigh. You are looking for 175 degrees Fahrenheit for dark meat, which is higher than the 165 required for breasts.
Pro Tip: Dark meat contains more connective tissue (collagen). It requires a higher internal temperature to fully hydrolyze that collagen into rich, lip-smacking gelatin.
9. The Carryover Period
Remove the chicken from the oven when it hits 170 degrees. Transfer it to a warm platter using tongs and let it sit, uncovered, for 10 minutes.
Pro Tip: This accounts for thermal carryover. The residual heat will push the internal temperature to the perfect 175-degree mark while the muscle fibers relax.
10. The Final Deglaze
While the meat rests, use a splash of chicken stock or white wine to scrape up the browned bits from the pan. Whisk in a knob of cold butter to create a glossy emulsion.
Pro Tip: This is an emulsification. The cold butter binds with the liquid to create a silky sauce that adds a final punch of piquant flavor to your dish.
The Deep Dive
From a macro perspective, baked thigh and legs chicken recipes provide a robust profile of protein and healthy fats. A standard thigh contains roughly 25 grams of protein and 15 grams of fat, making it an ideal candidate for Keto or Paleo lifestyles. To keep it Gluten-Free, ensure your spices and thickeners are certified. For a "Vegan" swap, you can apply these same roasting techniques to cauliflower steaks or oyster mushrooms, though the cooking times will decrease significantly.
The "Fix-It" guide for common pitfalls:
- Rubbery Skin: This happens if the oven is too cool. Fix it by finishing under the broiler for 120 seconds.
- Bloody Joints: This is common in dark meat near the bone. Ensure you hit 175 degrees; the heat neutralizes the myoglobin.
- Burnt Garlic: If your aromatics turn black, you added them too early. Next time, wait until the final 15 minutes of roasting.
For meal prep, reheating is a science. Avoid the microwave, which turns skin into wet paper. Instead, use a toaster oven at 350 degrees for 10 minutes. This reactivates the fats and restores the "day-one" crunch.
The Wrap-Up
You are now equipped with the technical prowess to turn a humble pack of poultry into a culinary event. Remember that cooking is as much about physics as it is about flavor. By controlling moisture, managing thermal gradients, and respecting the rest period, you ensure every meal is a success. Go forth, grab your tongs, and let the Maillard reaction work its magic. Your kitchen is about to smell incredible!
The Kitchen Table
How do I get the skin extra crispy?
Ensure the skin is bone-dry before oiling. Use a wire rack for 360-degree airflow and roast at high heat (425F). This allows the fat to render and fry the skin from both sides simultaneously.
Why is dark meat better for baking?
Dark meat has higher fat and collagen content. This makes it more flavorful and prevents it from drying out at the high temperatures required to achieve a golden, crispy exterior.
Can I bake thighs and legs together?
Yes, they have similar fat content and density. Ensure they are not crowded on the pan; crowding creates steam, which prevents the skin from crisping. Use a large sheet pan for even spacing.
How do I know when the chicken is done?
Use a digital thermometer to reach an internal temperature of 175 degrees Fahrenheit. At this temperature, the collagen has fully transformed into gelatin, ensuring the meat is tender and pulls away from the bone easily.