

Imagine the sizzle of cold fat hitting a hot pan; the sound is a rhythmic crackle that signals the start of something transformative. When you master japanese salted salmon recipes, you are not just cooking fish; you are performing an ancient ritual of moisture management and flavor concentration. The skin transforms into a glass-like sheet of savory candy, while the interior remains a buttery, translucent pink. It is the ultimate breakfast staple that feels like a warm hug for your soul.
We are diving deep into Shiozake today. This is the cornerstone of the Japanese breakfast tray, providing that piquant, oceanic punch that makes plain steamed rice sing. I want you to think of salt not as a seasoning, but as a structural engineer. It rearranges the proteins, firms up the flesh, and prepares the surface for the most glorious Maillard reaction you have ever witnessed. Whether you are meal prepping for a busy week or hosting a slow Sunday brunch, this technique is your new secret weapon.
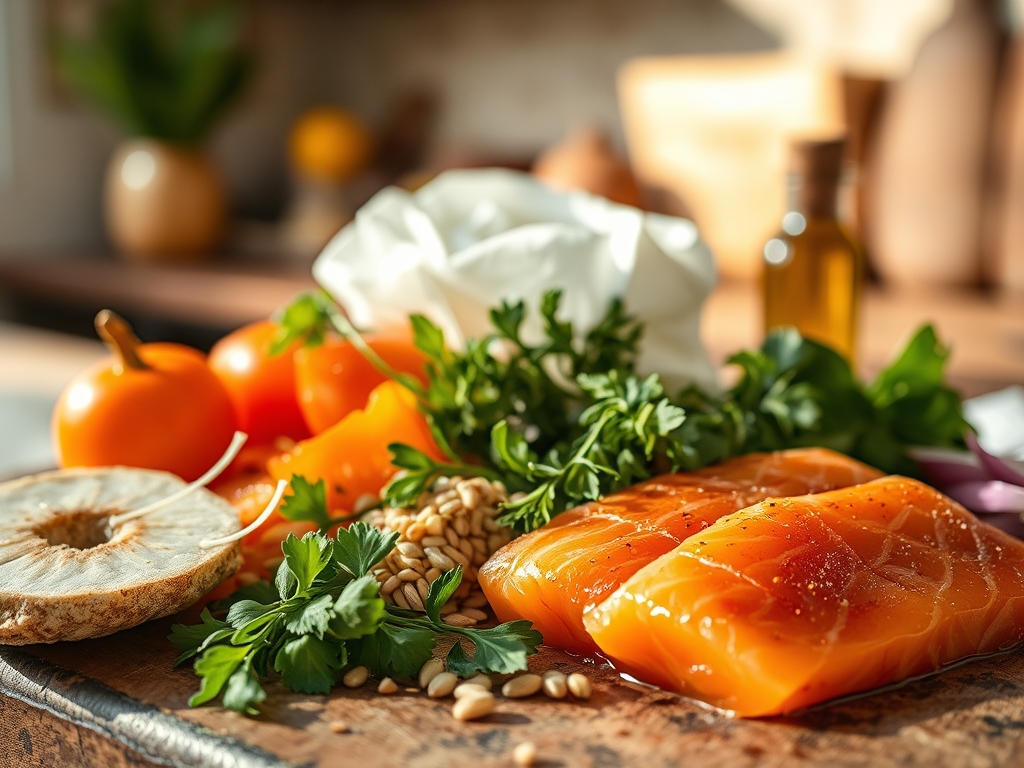
The Gathers:
To execute this properly, your mise-en-place must be precise. We are looking for high-quality Coho or Sockeye salmon fillets. Use a digital scale to weigh your salt; precision is the difference between a seasoned fillet and a salt lick.
- The Protein: 4 center-cut salmon fillets (roughly 150g each). Look for vibrant color and firm texture.
- The Cure: Sea salt (2 percent of the fish weight). Do not use table salt; the iodine creates a metallic aftertaste.
- The Deglazer: A splash of high-quality Sake. This acts as a solvent for fat-soluble flavor compounds.
- The Aromatics: Grated daikon radish (use a microplane for a fine snowy texture) and a wedge of lemon.
Smart Substitutions: If you cannot find Sake, a dry Sherry or even a splash of white wine will work to infuse the fish with acidity. For a lower sodium profile, you can swap half the salt for coconut aminos, though the texture will be slightly more viscous and less firm. If salmon is unavailable, Steelhead trout is a perfect anatomical double.
The Clock:
Mastering the "Chef's Flow" is about respecting the chemistry of the cure. You cannot rush osmosis.
- Prep Time: 10 minutes (scaling, drying, and salting).
- Curing Time: 12 to 24 hours (this is the non-negotiable window for protein denaturation).
- Cook Time: 8 to 10 minutes (depending on thickness).
- Rest Time: 3 minutes (essential for moisture redistribution).
The flow starts the night before. By salting early, you allow the salt to penetrate the cellular structure, which prevents the albumin (that white gunk) from leaking out during the cook.
The Masterclass:
1. The Surface Preparation
Pat the salmon bone-dry using lint-free paper towels. Moisture is the enemy of the crust. Use a bench scraper to clear your workstation of any scales or debris.
Pro Tip: Drying the skin is a mechanical process that aids evaporative cooling. If the surface is wet, the energy of the pan goes into boiling water rather than searing the fish; this prevents the skin from becoming crisp.
2. The Precision Cure
Sprinkle the salt evenly from a height of six inches to ensure total coverage. Place the fillets on a wire rack over a sheet pan. This allows air to circulate around the entire piece of fish.
Pro Tip: This stage initiates osmosis, drawing moisture out and then reabsorbing the concentrated brine. This "tightens" the protein fibrils, resulting in a flake that is firm yet succulent.
3. The Sake Bath
Just before cooking, lightly spritz the fillets with Sake. This helps to neutralize any "fishy" amines and adds a subtle sweetness.
Pro Tip: Alcohol has a lower boiling point than water. As it evaporates in the pan, it carries away volatile odors, leaving behind only the clean, sweet scent of the sea.
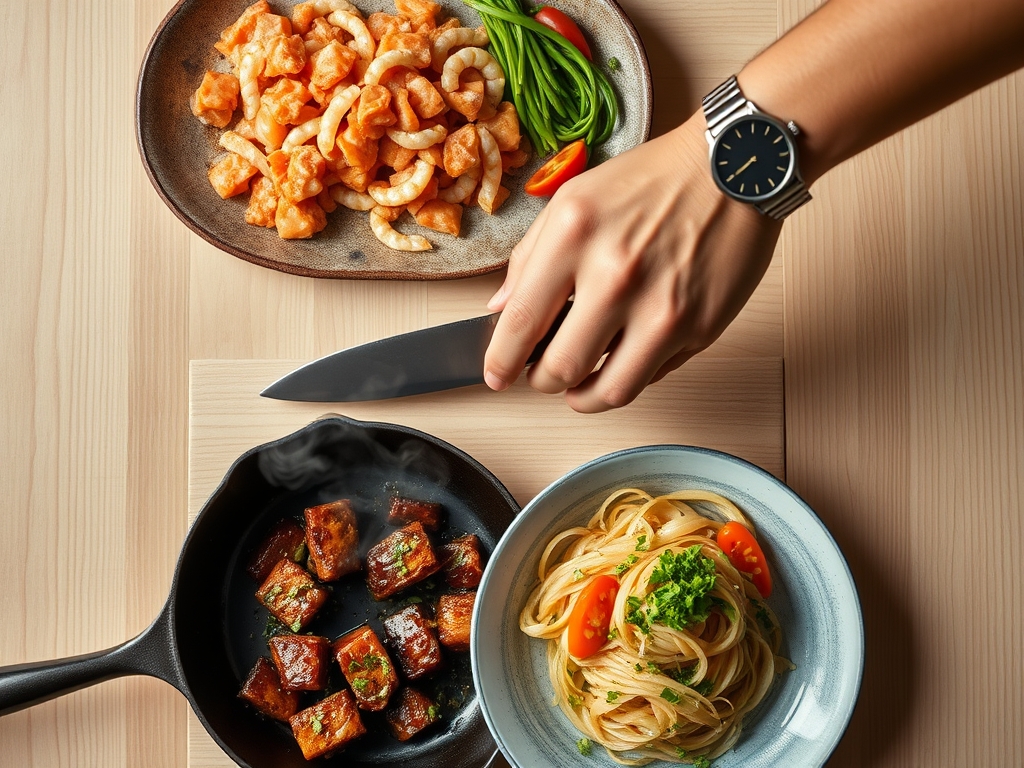
4. The High-Heat Sear
Heat a heavy-bottomed skillet (cast iron is best) over medium-high heat. Add a teaspoon of neutral oil. Place the salmon skin-side down and press firmly with tongs for 30 seconds.
Pro Tip: Pressing the fish prevents the skin from curling as the collagen fibers contract. This ensures maximum surface contact for a uniform Maillard reaction.
5. The Gentle Flip
Once the skin is shattered-glass crisp, flip the fish. Lower the heat slightly to finish the interior.
Pro Tip: Use a digital thermometer to pull the fish at 125 degrees Fahrenheit. Thermal carryover will bring it to a perfect 130 degrees while it rests, preventing the proteins from becoming chalky.
The Deep Dive:
Macro Nutrition: One serving of this salted salmon provides approximately 35g of high-quality protein and 12g of healthy Omega-3 fatty acids. It is naturally low in carbohydrates, making it a powerhouse for metabolic health.
Dietary Swaps:
- Vegan: Use thick slabs of King Oyster mushrooms. Score the tops and use the same salting technique; the mushrooms will render their moisture and take on a meaty, savory profile.
- Keto/GF: This recipe is inherently Keto and Gluten-Free. Ensure your Sake is "Junmai" to guarantee no added sugars or grain alcohols.
The Fix-It:
- Too Salty: If you over-salted, soak the cooked fish in a bowl of warm green tea for two minutes. The tea will extract excess salt via diffusion.
- Soggy Skin: Your pan was not hot enough. Next time, wait for the oil to shimmer and wisps of smoke to appear before adding the fish.
- Albumin Leaking: This happens when you cook the fish too fast at too high a temperature. Lower the heat and ensure you cured the fish for at least 12 hours to stabilize the proteins.
Meal Prep: To reheat without losing quality, avoid the microwave. Use a toaster oven at 350 degrees for 5 minutes. This keeps the skin crisp and prevents the fats from becoming oxidized and rancid.
The Wrap-Up:
You have officially graduated from basic frying to the sophisticated world of Japanese curing! By understanding the science of salt and heat, you have unlocked a level of flavor that most home cooks never reach. This salmon is more than a meal; it is a testament to the beauty of simple, high-quality ingredients treated with respect. Now, go grab your saucier to whisk up some miso soup, steam some rice, and enjoy the most balanced breakfast of your life. You earned it!
The Kitchen Table:
Can I use frozen salmon for this recipe?
Yes, but thaw it completely in the refrigerator first. Pat it extremely dry to remove excess "purge" moisture. Frozen salmon has a slightly compromised cell structure, so the curing process is even more vital for maintaining firmness.
How long does salted salmon stay fresh?
Once cured and cooked, it lasts for 3 to 4 days in an airtight container. The salt acts as a natural preservative, inhibiting bacterial growth, but the quality of the fats will eventually degrade due to oxidation.
Why is my salmon skin sticking to the pan?
This usually happens if the pan is not properly seasoned or if you try to flip the fish too early. The fish will naturally "release" from the surface once the skin has sufficiently dehydrated and browned.
Do I need to wash the salt off before cooking?
No, do not wash it. If you used the 2 percent ratio, the salt has been absorbed into the flesh. Washing it will only reintroduce moisture to the skin and ruin your chances of achieving a crispy texture.