
Picture this: the kitchen is humming with a golden, savory warmth that feels like a physical embrace. There is a specific, Pavlovian magic that happens when cold poultry meets a hot oven; the skin begins to sizzle as the lipids render, turning a pale bird into a burnished masterpiece. Finding the best whole chicken recipes is not just about a meal; it is about mastering the fundamental architecture of flavor. We are talking about that shatteringly crisp skin that yields to meat so succulent it practically dissolves. Whether you are a Sunday roast traditionalist or a weeknight speed-demon, the science of the bird remains the same. It is all about heat transfer, moisture retention, and that glorious Maillard reaction. We are going to strip away the intimidation and focus on the mechanics of the perfect roast. By the time we are done, you will treat your oven like a high-precision instrument and your chicken like the star of a five-star bistro. Grab your apron; we are going deep into the anatomy of the perfect roast.
The Gathers:
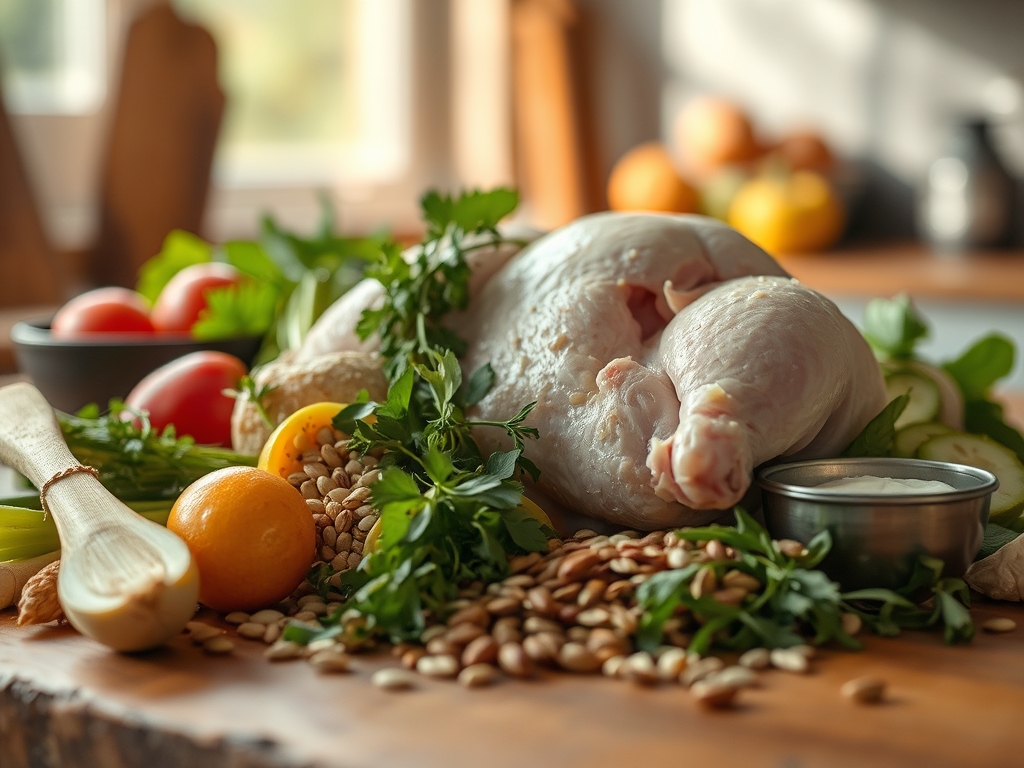
Before we ignite the burners, we must curate our mise-en-place with surgical precision. Start with a four to five-pound bird, preferably air-chilled. Air-chilled poultry has not been diluted by a water bath, meaning the skin is drier and the flavor is more concentrated. You will need high-quality fats; unsalted butter provides the milk solids for browning, while a high-smoke-point oil like avocado oil ensures the skin does not acridly burn at high temperatures.
Your aromatics are the soul of the dish. Gather fresh sprigs of rosemary, thyme, and sage. These contain volatile oils that will infuse the meat as the heat rises. You will also need a head of garlic, halved crosswise to expose the cloves, and a large lemon to provide a piquant acidity that cuts through the richness of the rendered fat. For seasoning, use a coarse kosher salt. The larger grains are easier to distribute evenly and help break down the surface proteins for a better crust.
Smart Substitutions: If you are out of fresh herbs, a high-quality poultry seasoning or dried herbes de Provence will suffice, but use only a third of the amount since dried herbs are more potent. No lemons? Use a tablespoon of sumac for that bright, citrusy punch. If you want a deeper umami profile, swap the butter for duck fat or even a high-quality ghee, which has a higher smoke point but maintains that nutty, viscous mouthfeel.
The Clock
Efficiency in the kitchen is about the Chef's Flow; it is the art of overlapping tasks so no time is wasted. Your total active prep time should be roughly 20 minutes, with a cooking window of 60 to 90 minutes depending on the weight of the bird and your chosen method.
The flow begins with the "Chill Break." Take your chicken out of the refrigerator 45 minutes before roasting. This is non-negotiable. If you put a cold bird in a hot oven, the exterior overcooks before the interior reaches safety. While the bird tempers, you prep your aromatics and preheat the oven. Once the bird hits the heat, you have a 15-minute window to clean your station and prep a side dish. The final stage is the "Resting Phase," which requires 15 to 20 minutes of patience. This is when the juices redistribute, ensuring your first slice is as moist as the last.
The Masterclass
1. The Desiccated Surface
The secret to the best whole chicken recipes is moisture management. Use paper towels to pat the bird until it is bone-dry, both inside and out. If the skin is wet, the oven's energy is wasted evaporating water rather than browning the skin. For the ultimate result, leave it uncovered in the fridge for four hours.
Pro Tip: This process is called surface dehydration. By removing external moisture, you accelerate the Maillard reaction, a chemical reaction between amino acids and reducing sugars that gives browned food its distinctive flavor.
2. The Truss and Tuck
Using kitchen twine, tie the legs together and tuck the wing tips behind the back. This creates a compact, uniform shape. A loose bird has too much surface area exposed, leading to uneven cooking where the breasts dry out before the thighs are done.
Pro Tip: This technique promotes thermal equilibrium. A compact shape ensures that heat penetrates the thickest parts of the bird at a rate consistent with the smaller extremities.
3. The Fat Barrier
Slather the skin with your chosen fat. Use your hands to get under the skin of the breast, inserting butter or herb-infused oil directly onto the meat. This acts as an insulator and a flavor delivery system. Use a microplane to zest lemon over the top for an extra layer of brightness.
Pro Tip: This is essentially basting from the inside. The fat prevents the lean breast meat from losing moisture to the dry oven air, acting as a sacrificial layer of protection.
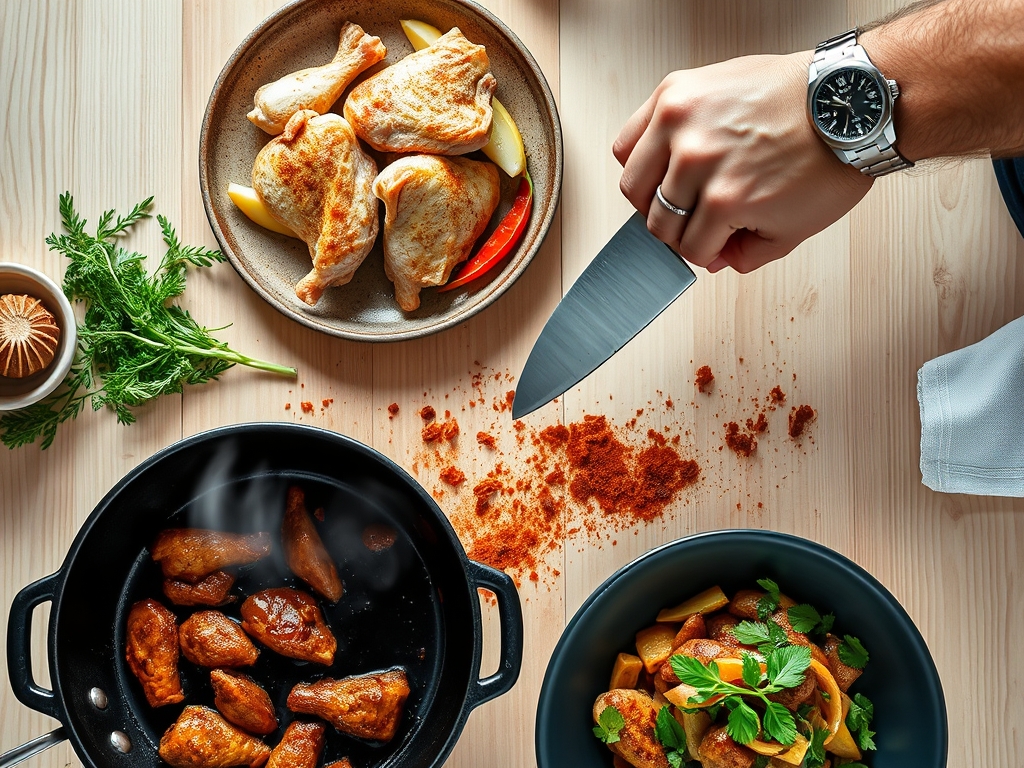
4. The High-Heat Launch
Start your roast at 425 degrees Fahrenheit for the first 20 minutes. This initial blast of heat causes the skin to contract and the fat to begin to render rapidly. Use a heavy-bottomed skillet or a roasting pan to ensure even heat distribution from the bottom up.
Pro Tip: High initial heat triggers enzymatic browning. This sets the structural integrity of the skin early, ensuring it stays crispy even as the internal temperature continues to rise.
5. The Temperature Glide
Drop the oven temperature to 350 degrees Fahrenheit to finish. This allows the internal temperature to climb slowly without scorching the exterior. Use a digital scale to track weight-to-time ratios, but always rely on a meat thermometer for the final word.
Pro Tip: This transition manages thermal carryover. If you cook at high heat the whole time, the internal temperature will continue to spike by 10 degrees after removal, potentially overshooting the safety zone.
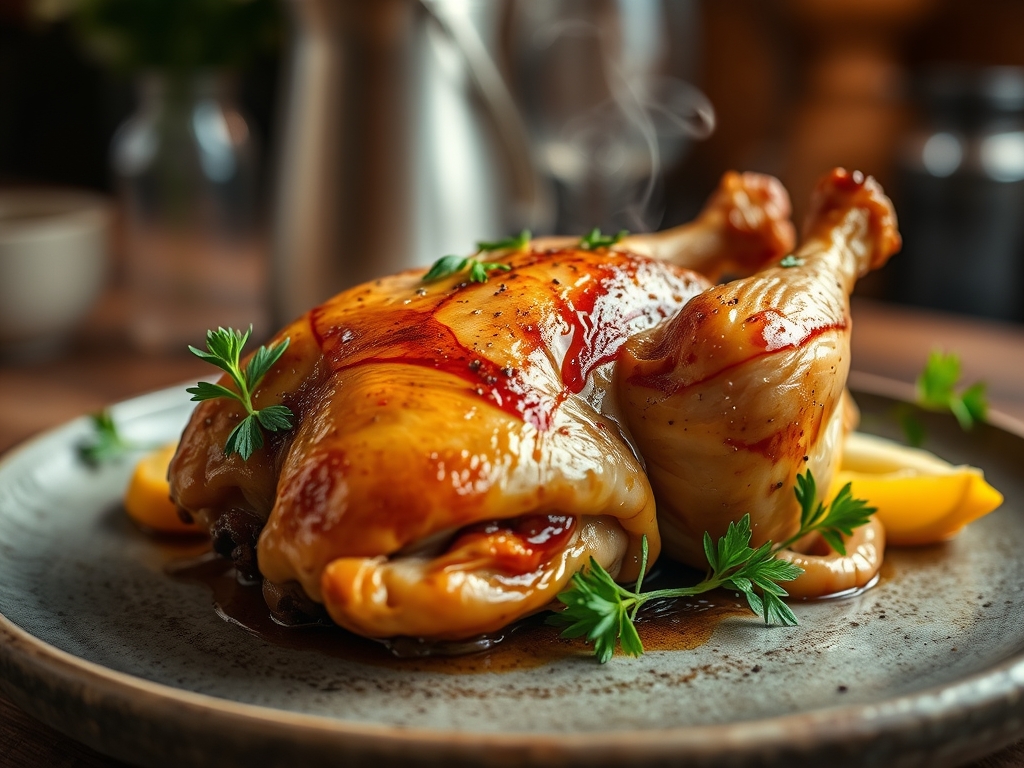
6. The Sacred Rest
Once the thigh reaches 165 degrees Fahrenheit, remove the bird and place it on a warm platter. Do not tent it tightly with foil, as this will steam the skin and make it soggy. Let it sit for at least 15 minutes before using a sharp carving knife or bench scraper to portion.
Pro Tip: Resting allows for reabsorption of cellular fluids. As the meat cools slightly, the muscle fibers relax and pull the juices back in, rather than letting them spill out onto the cutting board.
The Deep Dive
From a nutritional standpoint, a roast chicken is a powerhouse. It is a high-density source of lean protein, essential B vitamins, and minerals like phosphorus and selenium. For those following a Keto lifestyle, the skin provides healthy fats that keep you in ketosis. Gluten-Free diners can rejoice, as this is a naturally grain-free masterpiece. If you are cooking for a Vegan guest, you can use the same aromatic techniques on a whole roasted cauliflower head, using olive oil instead of butter to achieve a similar golden crust.
The Fix-It: Common Pitfalls
- Soggy Bottom: If the bottom of your chicken is wet, you are likely roasting it directly on the pan. Use a roasting rack or a bed of thick-cut root vegetables to aerate the underside.
- Dry Breast Meat: This happens when the bird is not trussed or the temperature is too high for too long. Fix this by roasting the bird breast-side down for the first 30 minutes to let the juices pool in the white meat.
- Rubbery Skin: This is caused by under-rendering. If the bird is done but the skin is pale, turn on the broiler for 2 to 3 minutes, watching it like a hawk.
Meal Prep Science: To maintain "day-one" quality when reheating, avoid the microwave. The microwave agitates water molecules, which can make the chicken "rubbery." Instead, use a saucier to warm a little chicken stock, add your sliced meat, and heat gently on the stovetop to rehydrate the fibers.
The Wrap-Up
Mastering the best whole chicken recipes is a rite of passage for any home cook. It is the perfect blend of chemistry and soul. By focusing on surface moisture, fat distribution, and temperature control, you transform a humble ingredient into a spectacular feast. Remember, the kitchen is your laboratory, and every roast is an opportunity to refine your technique. So, go ahead; grab that bird, fire up the oven, and prepare to be the hero of your own dinner table.
The Kitchen Table
How do I know when the chicken is truly done?
Use a digital meat thermometer inserted into the thickest part of the thigh without hitting bone. It should read 165 degrees Fahrenheit. The juices should run clear, and the leg should wiggle easily in its socket.
Can I roast a chicken without a roasting pan?
Absolutely. A heavy-bottomed skillet or a cast-iron pan is actually superior for heat retention. It allows the dark meat to cook faster than the breasts, resulting in a more evenly cooked bird with a crispier bottom.
Why is my roasted chicken skin not getting crispy?
The culprit is usually residual moisture or overcrowding. Ensure the skin is completely dry before adding oil. Also, do not crowd the pan with too many vegetables, as they release steam that prevents the skin from crisping.
Is it necessary to wash a chicken before roasting?
No, you should never wash raw poultry. It does not remove bacteria; instead, it splashes pathogens across your sink and counters. High oven heat is the only effective way to kill any lingering bacteria safely.