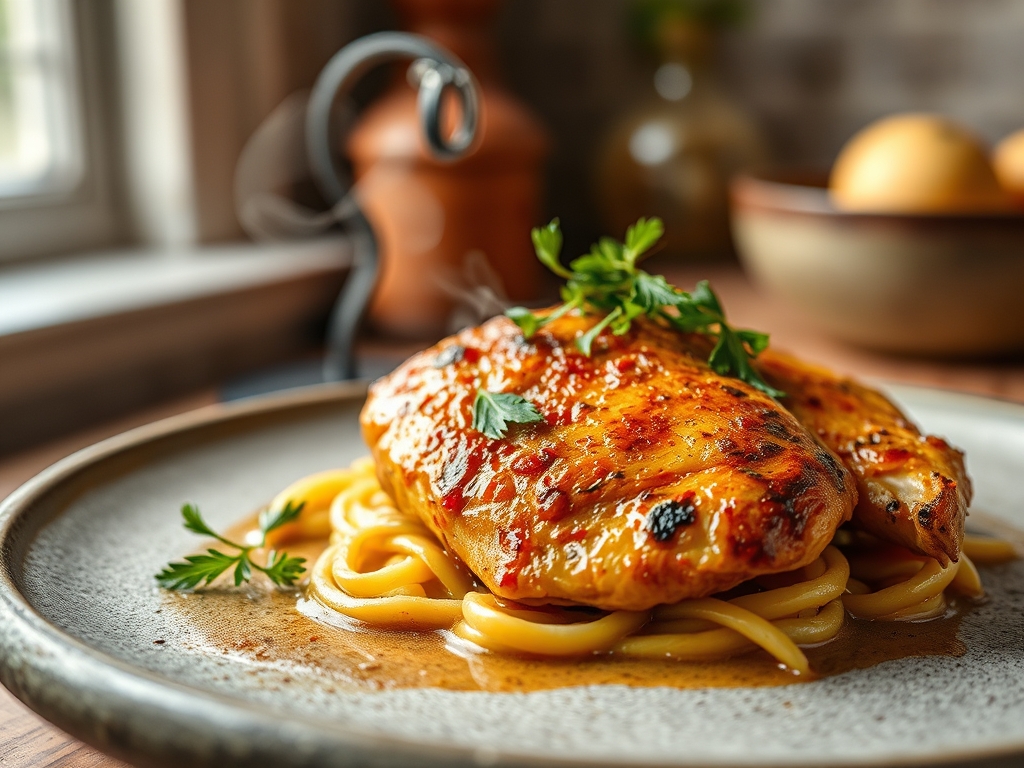
Imagine the sound of a heavy bottomed skillet hitting the burner; that rhythmic clink is the opening note of a culinary masterpiece. We are talking about the ultimate comfort food that manages to stay sophisticated. Finding the perfect romano chicken recipes means balancing the sharp, salty punch of aged sheep milk cheese with the delicate proteins of a perfectly seared cutlet. It is a sensory overload of golden crusts and herbaceous aromas.
The magic happens when the heat hits the Pecorino Romano. Unlike Parmesan, which is nutty and mild, Romano is aggressive and piquant. When it meets the high heat of a pan, it undergoes a stunning transformation. It does not just melt; it creates a lacy, shattered glass texture that clings to the chicken. This is the gold standard of weeknight luxury. Whether you are aiming for a classic pan fry or a modern air fried twist, these romano chicken recipes are designed to elevate your kitchen game from basic to boutique.
We are going to dive deep into the molecular structure of the perfect crust. We will explore how to achieve that shatteringly crisp exterior while maintaining a succulent, juice filled interior. Grab your favorite apron and clear the counter. It is time to turn your kitchen into a high end bistro where the Romano is always fresh and the chicken is always tender.
The Gathers:
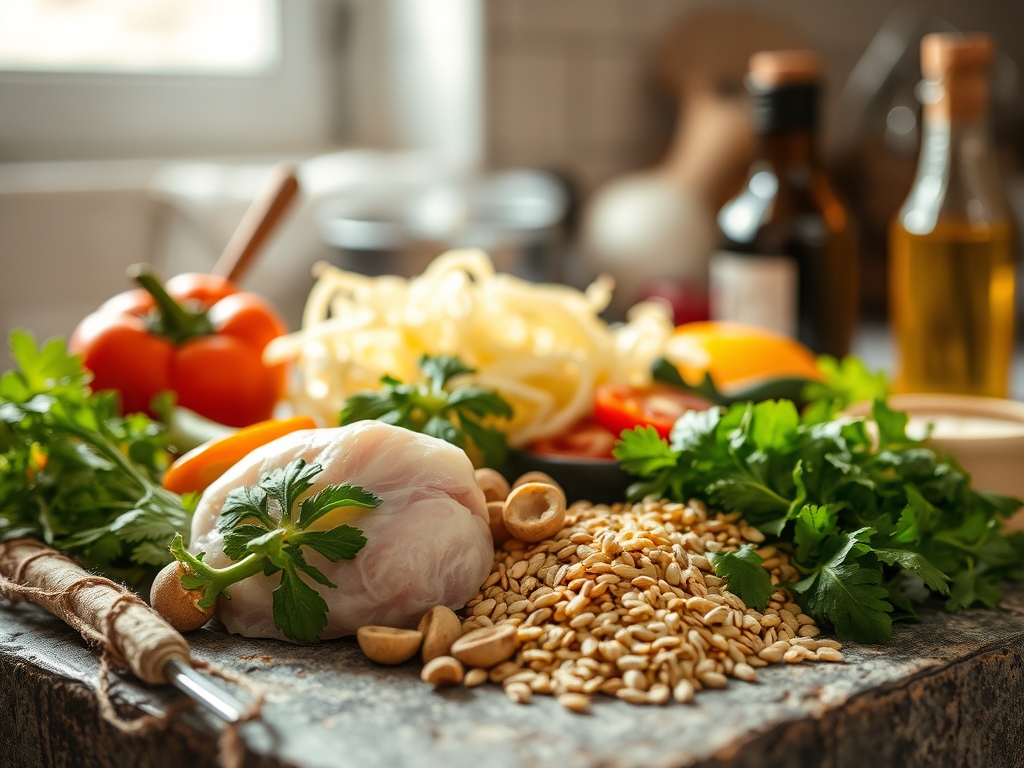
To execute these romano chicken recipes with precision, your mise en place must be impeccable. Start with high quality chicken breasts, ideally air chilled to prevent excess water release during the sear. You will need a microplane to grate your Pecorino Romano into a fine, snowy powder. This increased surface area is vital for even distribution and rapid melting.
Your dry station should include all purpose flour, which acts as the primary desiccant to dry the meat surface. For the binder, use farm fresh eggs whisked until the proteins aerate and become slightly viscous. The breading component is a 50/50 split of panko breadcrumbs and finely grated Romano. Add a pinch of smoked paprika for color and a heavy dose of cracked black pepper.
Smart Substitutions:
If you are avoiding gluten, swap the flour for arrowroot powder and use crushed pork rinds instead of panko for a keto friendly crunch. If Pecorino Romano is too sharp for your palate, a blend of Grana Padano and Romano offers a smoother, more rounded salt profile. For a vegan "chicken" alternative, use pressed extra firm tofu slices, though you must ensure they are bone dry before the dredging process begins.
The Clock
The "Chef's Flow" is all about kinetic energy and timing. Expect a total active time of 40 minutes. Prep takes roughly 15 minutes, which includes slicing the chicken into uniform cutlets and setting up your three stage dredging station. Using a digital scale to weigh your cheese ensures consistency across every batch.
The cooking phase is rapid. Each cutlet requires only 3 to 4 minutes per side in a heavy bottomed skillet. The goal is to reach an internal temperature of 165 degrees Fahrenheit, but you should pull the meat at 160 degrees to account for thermal carryover. Allow a 5 minute rest period on a wire rack to prevent the bottom from becoming soggy.
The Masterclass
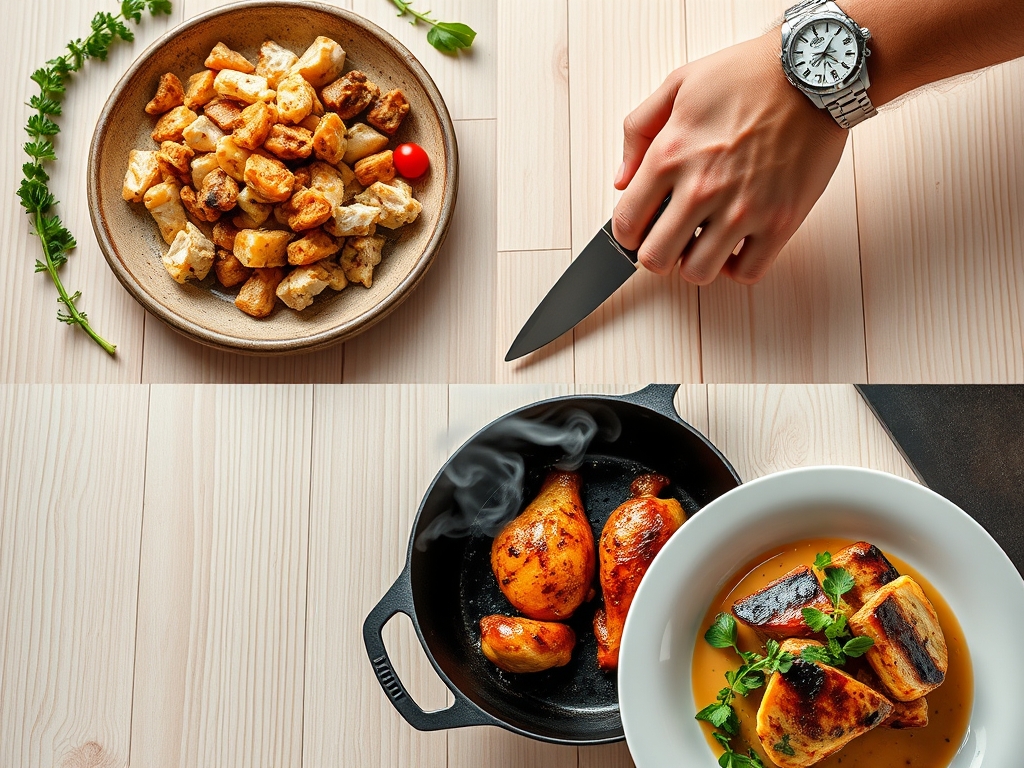
1. The Butterfly and Pound
Place the chicken breast on a clean cutting board and use a sharp chef's knife to butterfly it horizontally. Cover with plastic wrap and use a meat mallet to pound the meat to a uniform half inch thickness.
Pro Tip: Uniformity is not just for aesthetics; it ensures even heat distribution so the edges do not dry out before the center is cooked. This prevents protein denaturing at different rates.
2. The Triple Dredge
Dredge the chicken in seasoned flour, dip into the whisked egg wash, and finally press firmly into the Romano and panko mixture. Use your palms to ensure the coating adheres to every crevice.
Pro Tip: Pressing the coating firmly creates a structural bond. This prevents the "blow away" crust phenomenon where the breading separates from the meat during the frying process.
3. The Sizzling Sear
Heat a mixture of olive oil and unsalted butter in your skillet over medium high heat. Once the butter stops foaming, carefully lay the chicken away from you into the pan.
Pro Tip: The foaming stops when the water in the butter has evaporated. This is your cue that the fat is hot enough to trigger the Maillard reaction, creating that savory, browned crust.
4. The Deglaze and Emulsify
Remove the chicken and set aside. Pour a splash of dry white wine or chicken stock into the hot pan, using a bench scraper or wooden spoon to lift the browned bits (the fond). Whisk in a cold pat of butter.
Pro Tip: This creates a pan sauce through emulsification. The cold butter fat binds with the acidic wine to create a glossy, velvet like coating for your chicken.
The Deep Dive
Macro Nutrition:
A standard serving of Romano chicken provides approximately 35 grams of protein and 18 grams of fat. While the cheese adds sodium, it also provides a significant dose of calcium. To lower the caloric density, you can bake the chicken at 400 degrees Fahrenheit on a parchment lined sheet, though you will lose some of that signature pan seared texture.
Dietary Swaps:
For a Keto version, replace the flour with almond meal. For a dairy free alternative that still mimics the Romano flavor, use nutritional yeast mixed with sea salt and garlic powder. This provides that same piquant punch without the lactose.
The Fix-It:
- Soggy Crust: This happens if the pan is crowded. Cook in batches to maintain high oil temperature.
- Burned Cheese: If the Romano browns too fast, your heat is too high. Lower the flame and add a splash of fresh oil to cool the pan.
- Dry Meat: You likely skipped the resting phase. Resting allows the juices to redistribute through the muscle fibers.
Meal Prep & Reheating:
To maintain "day one" quality, never use a microwave. Reheat your Romano chicken in a toaster oven or air fryer at 350 degrees for 5 minutes. This reactivates the fats in the cheese and recrisps the panko, ensuring the crust remains shattered and light.
The Wrap-Up
Mastering romano chicken recipes is a gateway to becoming a more intuitive cook. It teaches you the importance of temperature control, the chemistry of breading, and the art of the pan sauce. This dish is a powerhouse of flavor that works just as well for a frantic Tuesday as it does for a candlelit Saturday dinner. With its golden hue and sharp, cheesy bite, it is a recipe that demands a permanent spot in your rotation. Go forth, grate that cheese with abandon, and enjoy the crunch.
The Kitchen Table
Can I use pre-grated cheese for this recipe?
Avoid pre-grated cheese because it is coated in cellulose to prevent clumping. This coating interferes with the melting process and prevents the cheese from forming a cohesive, crispy crust on your chicken. Always grate fresh from a wedge.
What is the best oil for frying Romano chicken?
Use a neutral oil with a high smoke point, such as avocado or grapeseed oil, mixed with a little butter. The oil prevents the butter from burning while the butter provides essential flavor and aids in browning.
How do I keep the breading from falling off?
Ensure the chicken is patted completely dry before the flour stage. After breading, let the chicken rest on a plate for 10 minutes before frying. This allows the flour and egg to hydrate and form a "glue."
What sides pair best with Romano chicken?
Balance the richness with acidity. A bright arugula salad with lemon vinaigrette or garlicky sautéed broccolini works perfectly. For a heartier meal, serve over al dente linguine tossed in a light lemon butter sauce or a simple aglio e olio.