
Picture a pantry staple that transforms from a humble silver tin into a gourmet masterpiece with just a flick of a wrist and a heavy bottomed skillet. We are moving far beyond basic survival food today. When you master lakeside canned beef recipes, you are essentially working with a pre-braised, collagen-rich protein that has already undergone the long, slow process of thermal breakdown. This means the connective tissues have converted into gelatin; providing a luxurious mouthfeel that would normally take six hours in a Dutch oven to achieve. We are going to exploit that structural integrity to create textures ranging from crispy, Maillard-reactive edges to silky, emulsified sauces. Whether you are at a cabin or in a high-tech kitchen, these hacks utilize the science of fat rendering and aromatic infusion to elevate canned beef into something unrecognizable as "shelf-stable." It is about understanding the molecular transition from cold, solid fats to a shimmering, viscous glaze that clings to every forkful. Let us dive into the chemistry of the tin.
The Gathers:
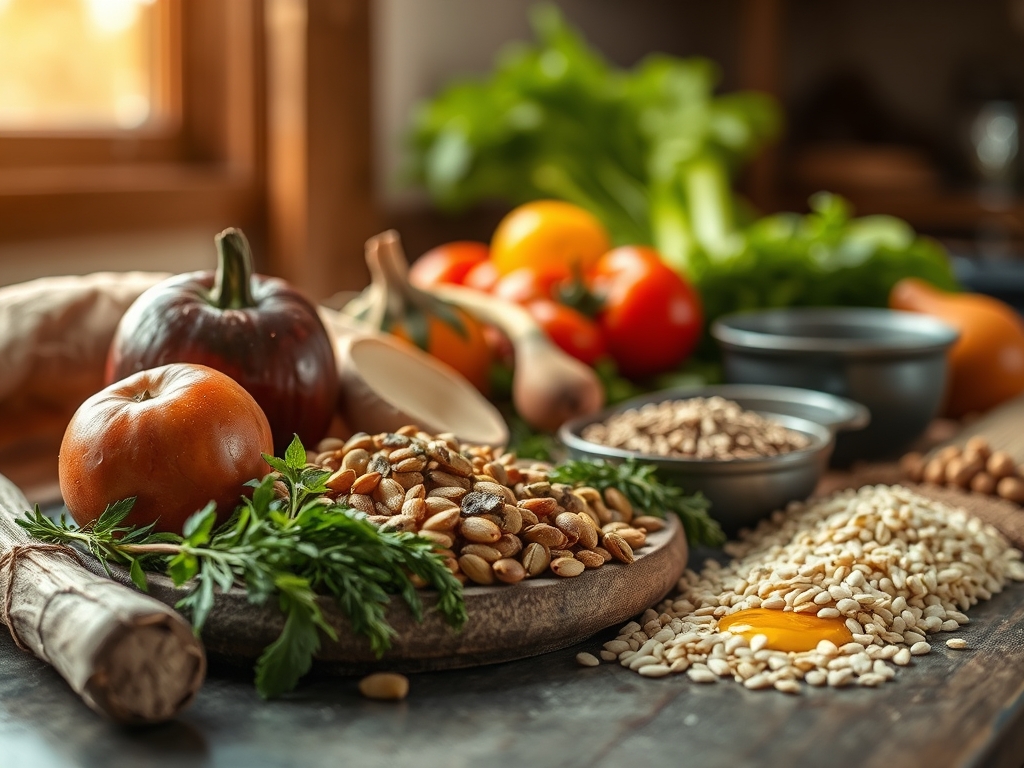
To execute these hacks, your mise-en-place must be precise. Start with three 14.5-ounce cans of Lakeside beef. You will notice the beef is packed in its own juices; do not discard this liquid. It is a concentrated stock rich in umami-heavy amino acids. You will also need high-smoke-point fats like avocado oil or clarified butter (ghee) to achieve high-heat searing without acridity. For the aromatics, gather fresh shallots, garlic cloves, and ginger. Use a microplane to grate these into a fine paste; this increases the surface area for rapid enzymatic release of essential oils.
For the "Smart Substitutions," if you lack fresh aromatics, use fermented black garlic or a dash of Worcestershire sauce to mimic the depth of a long-simmered demi-glace. If you are aiming for a brighter profile, swap heavy cream for full-fat coconut milk to maintain the emulsification while adding a tropical lilt. A splash of apple cider vinegar or a squeeze of lime is non-negotiable; the acetic acid cuts through the dense lipid profile of the canned beef, balancing the palate and preventing "palate fatigue."
The Clock
Efficiency in the kitchen is dictated by the "Chef's Flow." This is the practice of overlapping tasks to minimize downtime. For these nine hacks, the total active prep time is approximately 15 minutes. This involves your knife work: dicing vegetables with a sharp chef's knife and using a bench scraper to transfer ingredients cleanly to your workstation.
The cooking time varies by hack, but generally falls between 8 and 12 minutes. Because the beef is technically "pre-cooked," your goal is not internal temperature safety but rather textural transformation. You are spending 4 minutes on high-heat moisture evaporation and 6 minutes on flavor integration. By the time your pasta or rice has finished its boiling cycle, your beef transformation should be complete. This synchronized timing ensures that the protein does not sit and lose its structural tension before serving.
The Masterclass
1. The Maillard Sear
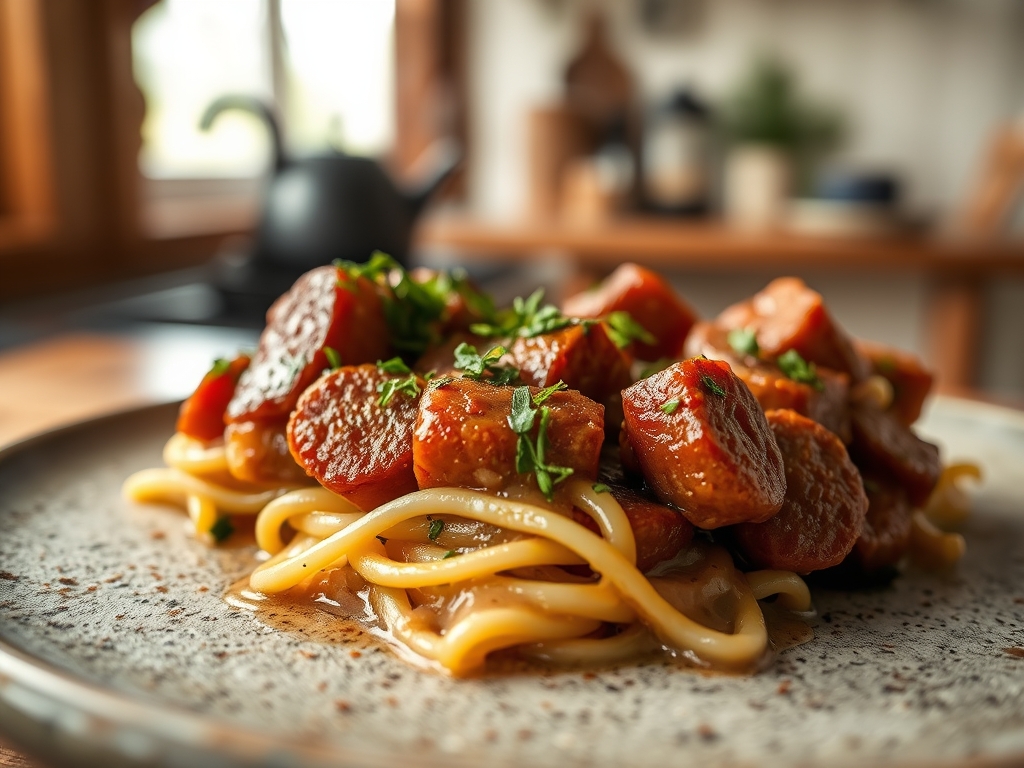
Empty the can into a mesh strainer to separate the solids from the liquid. Pat the beef dry with paper towels. Heat a heavy-bottomed skillet until it wisps with smoke, then add the beef in a single layer. Do not move it for three minutes.
Pro Tip: This relies on the Maillard reaction, a chemical dance between amino acids and reducing sugars. By removing surface moisture, you allow the temperature to exceed 285 degrees Fahrenheit, creating the complex brown crust that defines "roasted" flavor.
2. The Deglaze and Emulsify
Once the beef is seared, remove it. Pour the reserved canning liquid into the hot pan. Use a wooden spoon or tongs with a silicone tip to scrape the "fond" (the brown bits) from the bottom.
Pro Tip: This is deglazing. The liquid acts as a solvent, pulling flavorful compounds back into a sauce. Whisk in a cold knob of butter at the end to create a stable emulsion, giving the sauce a glossy, professional finish.
3. The Aromatic Infusion
Push the beef to the perimeter of the pan and drop your microplaned garlic and ginger into the center. Toast them for exactly 45 seconds until they become fragrant but not bitter.
Pro Tip: This is blooming your aromatics. Fat-soluble flavor compounds in garlic and spices are released more efficiently in hot oil than in water-based liquids, intensifying the overall flavor profile of the dish.
4. The Acid Balance
Just before finishing, add a tablespoon of balsamic glaze or red wine vinegar. Toss the beef vigorously to coat every fiber.
Pro Tip: Acid acts as a molecular "brightener." It breaks down the perception of heavy fats on the tongue by stimulating saliva production, which helps clear the palate and makes the beef taste "lighter" and more complex.
5. The Texture Contrast
Fold in toasted panko breadcrumbs or crushed nuts at the very last second. Use a digital scale to ensure your ratios are consistent every time you cook.
Pro Tip: This creates sensory contrast. The human brain finds dishes more satisfying when they feature a variety of textures, such as the soft, braised beef against a sharp, crystalline crunch.
6. The Umami Bomb
Add a teaspoon of miso paste or tomato paste to the rendering fat before adding the liquid. Stir until it darkens slightly.
Pro Tip: This introduces glutamates. By caramelizing the sugars in the paste, you create a deeper "fifth taste" that bridges the gap between the canned beef and fresh-cooked steak.
7. The Aerated Finish
If making a beef gravy or stroganoff style hack, use a whisk to vigorously aerate the sauce as it thickens.
Pro Tip: Aeration incorporates tiny air bubbles, which lightens the density of the sauce and allows the aromas to reach your olfactory sensors more quickly as you eat.
8. The Low and Slow Fold
For recipes like beef tacos or sliders, shred the beef with two forks while it is still cold, then fold it into a warm sauce.
Pro Tip: Shredding cold beef preserves the fiber length. If you shred it while hot, the fibers tend to shatter, resulting in a mushy texture rather than a "pulled" appearance.
9. The Thermal Rest
Even canned beef benefits from a two-minute rest off the heat before serving.
Pro Tip: This allows for thermal equilibrium. The juices within the muscle fibers redistribute as the temperature drops slightly, ensuring that the moisture stays in the meat rather than leaking out onto the plate.
The Deep Dive
From a macro perspective, Lakeside canned beef is a protein powerhouse. A standard serving offers roughly 21 grams of protein with zero carbohydrates; making it an ideal foundation for Keto or Paleo lifestyles. For those following a Gluten-Free diet, the beef itself is naturally safe, but ensure your thickening agents are cornstarch or arrowroot rather than wheat flour. For a "Vegan" swap, you would obviously move toward jackfruit, but the techniques of searing and deglazing remain identical.
The Fix-It:
- Problem: Too Salty. Fix: Add a peeled potato to the simmering sauce for five minutes; the starch absorbs excess sodium. Alternatively, add a pinch of sugar to distract the taste buds.
- Problem: Mushy Texture. Fix: You likely skipped the drying step. Next time, use a digital scale to weigh your beef and ensure the pan isn't overcrowded, which causes steaming instead of searing.
- Problem: Greasy Mouthfeel. Fix: Increase the acidity. A heavy splash of lemon juice or a spoonful of Dijon mustard will emulsify the stray fats back into the sauce.
Meal Prep Science: To reheat, avoid the microwave if possible. Use a small saucier on the stovetop with two tablespoons of water. This creates a steam-jacket effect that re-hydrates the protein fibers without toughening them through electromagnetic radiation.
The Wrap-Up
Mastering lakeside canned beef recipes is the ultimate culinary "cheat code." You are taking a shelf-stable product and using high-level techniques like Maillard browning, deglazing, and aromatic blooming to create a meal that tastes like it spent all day on the stove. It is about the confidence to use your tongs and heavy-bottomed skillet to manipulate texture and flavor at a molecular level. Go ahead; crack a tin and show that pantry staple who is boss.
The Kitchen Table
How do I make canned beef taste like fresh roast?
The secret is the Maillard reaction. Drain the beef, pat it bone-dry, and sear it in a screaming-hot skillet with ghee. This creates the browned, crusty exterior and complex flavor profile typical of fresh oven-roasted meats.
Can I use the liquid inside the can?
Absolutely. That liquid is concentrated beef stock filled with gelatin and umami. Use it to deglaze your pan after searing the beef; it creates a built-in sauce that is rich, viscous, and incredibly flavorful.
How do I prevent the beef from falling apart?
Handle the beef as little as possible during the initial sear. Use tongs to gently flip the chunks rather than stirring with a spoon. This preserves the structural integrity of the pre-braised muscle fibers.
Is canned beef healthy for meal prep?
Yes, it is high in bioavailable protein and essential minerals like iron. To keep it healthy, pair it with high-fiber vegetables and use the "Fix-It" method of adding acid to balance the natural fats without adding extra calories.