
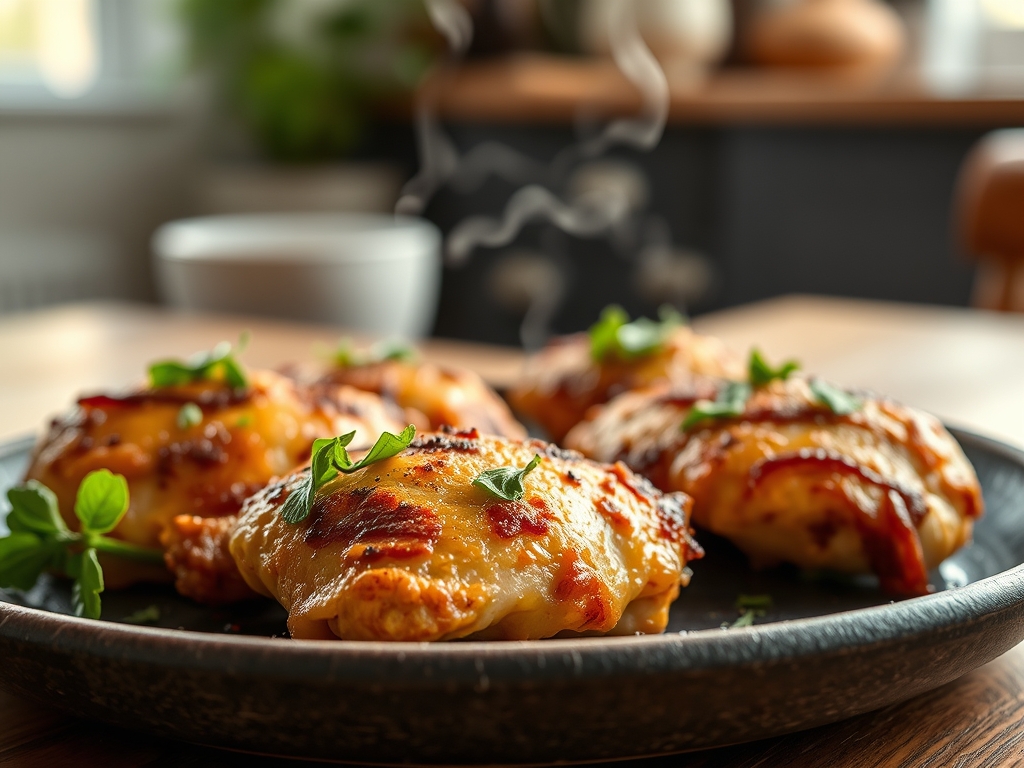
Picture the sound of a heavy-bottomed skillet sliding across a cast iron grate; then imagine the shattering crunch of a perfectly golden crust. We have all been there, staring through the oven glass, praying our dinner does not turn into a soggy, pale disappointment. Mastering baked crispy chicken recipes is not just about heat; it is about manipulating moisture and protein structures to mimic a deep fryer without the vat of oil. We are going for that piquant, savory shatter that resonates in your teeth.
Achieving this level of culinary excellence requires more than luck. It requires an understanding of the Maillard reaction, the chemical dance between amino acids and reducing sugars that creates that signature brown hue and complex flavor profile. You are about to transform your kitchen into a laboratory of deliciousness. Forget what you know about basic breading. We are diving deep into the mechanics of heat transfer and surface area to ensure every bite is a structural masterpiece. Grab your digital scale and your favorite apron; we are going to build the ultimate crunch from the ground up.
The Gathers:
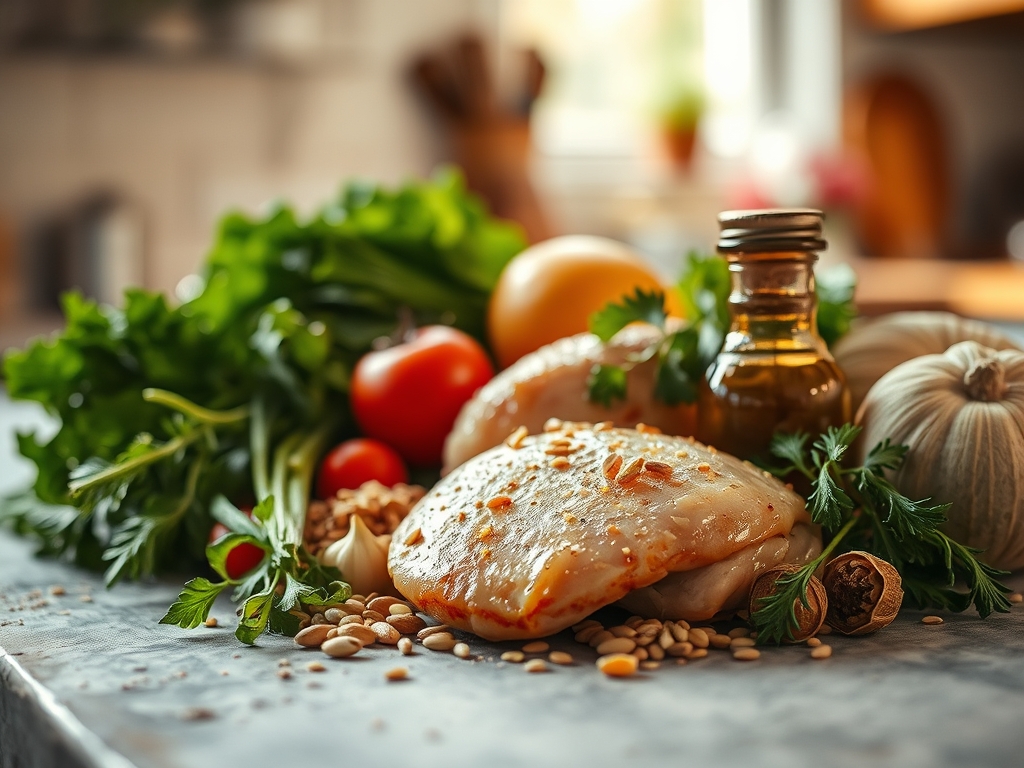
To begin, organize your mise-en-place with precision. You will need high-quality chicken thighs or breasts, ensuring they are brought to room temperature to prevent thermal shock. For the coating, gather panko breadcrumbs, which offer a larger surface area than traditional crumbs, allowing for better aeration. You will also need a high-smoke-point fat, like avocado oil or clarified butter, to facilitate even heat distribution.
The flavor profile relies on a piquant blend of smoked paprika, garlic powder, and onion powder. Do not forget the secret weapon: baking powder. This alkaline addition raises the pH level of the chicken skin, breaking down peptide bonds and accelerating the browning process. For the binding agent, a viscous egg wash or a coating of Greek yogurt works beautifully to ensure the dry ingredients adhere.
Smart Substitutions: If you are avoiding gluten, crushed pork rinds or almond flour mixed with parmesan cheese provide an excellent structural alternative. For a vegan-friendly binder, use an aquafaba whip; the proteins in chickpea water emulsify beautifully to hold your crust in place. If you lack panko, toasted sourdough crumbs processed with a microplane can create a rustic, jagged texture that catches the heat perfectly.
The Clock
Efficiency in the kitchen is about "Chef's Flow." This is the logical sequencing of tasks to minimize downtime and maximize quality. Total preparation time should take approximately 20 minutes, while the active cook time spans 25 to 35 minutes depending on the thickness of your protein.
Start by preheating your oven to a high 425 degrees Fahrenheit. While the oven stabilizes, execute your dredging station. The "Flow" dictates that you use one hand for wet ingredients and one for dry to avoid "club hand." Once the chicken is in the oven, use the 30-minute window to prepare your sides or a bright, acidic reduction sauce. Allow for a mandatory 5-minute rest period post-bake; this is non-negotiable for moisture retention.
The Masterclass

1. The Desiccation Phase
Pat your chicken bone-dry using lint-free paper towels. Any surface moisture will turn to steam in the oven, which is the enemy of crunch.
Pro Tip: This utilizes the principle of evaporative cooling. By removing surface water, the chicken can immediately begin the Maillard reaction rather than wasting energy evaporating moisture.
2. The Alkaline Boost
Dust the chicken lightly with a mixture of salt and baking powder. Let it sit for ten minutes before breading.
Pro Tip: The baking powder creates tiny CO2 bubbles on the surface, increasing the surface area and creating a craggy, crisp texture once the heat hits.
3. The Dredge Sequence
Use a three-stage station: seasoned flour, egg wash, and finally your panko mixture. Press the crumbs firmly into the meat using a bench scraper to ensure total coverage.
Pro Tip: This creates a multi-layered protein matrix. The flour bonds to the meat, the egg acts as a biological glue, and the crumbs provide the structural exterior.
4. The Elevated Bake
Place a wire rack inside a rimmed baking sheet. Position your chicken on the rack so air can circulate underneath.
Pro Tip: This facilitates convection heating on all sides of the protein, preventing the bottom from becoming soggy in its own rendered fats.
5. The Fat Infusion
Spritz the breaded chicken lightly with an oil mister or use a pastry brush to dab on melted fat.
Pro Tip: Fat is a superior thermal conductor compared to air. It transfers heat into the breadcrumbs faster, ensuring they brown before the chicken overcooks.
6. The Carryover Rest
Remove the chicken when the internal temperature hits 160 degrees Fahrenheit. Transfer it to a warm plate using tongs.
Pro Tip: Thermal carryover will raise the internal temperature to the safe 165-degree mark while the juices redistribute, ensuring a succulent interior.
The Deep Dive
From a macro perspective, this method is a nutritional powerhouse. By baking instead of frying, you reduce the lipid content significantly while maintaining high protein density. A standard serving contains roughly 35g of protein and only 12g of fat, depending on your choice of cut.
Dietary Swaps: For Keto enthusiasts, replace the panko with a 50/50 mix of parmesan and crushed macadamia nuts. For a Vegan version, use firm tofu pressed for two hours, then follow the same dredging steps using a flax-egg binder.
The Fix-It:
- Soggy Bottoms: You likely skipped the wire rack. Use a cooling rack inside your pan to allow airflow.
- Crumb Shedding: Your chicken was too wet before the flour stage. Ensure a total dry-down before you begin.
- Burnt Outside, Raw Inside: Your oven rack is too high. Move it to the center position to balance radiant heat.
Meal Prep Science: To reheat and maintain "day-one" quality, avoid the microwave. The microwave agitates water molecules, making the crust limp. Instead, use an air fryer or toaster oven at 375 degrees for five minutes to re-render the fats and crisp the exterior.
The Wrap-Up
You now possess the technical blueprint for the most incredible chicken of your life. By mastering the balance of pH levels, moisture control, and convective heat, you have elevated a simple weeknight meal into a culinary event. Remember, the secret is in the details: the dry skin, the baking powder, and the elevated rack. Go forth and shatter some expectations. Your kitchen, your rules, and now, your perfect crunch.
The Kitchen Table
How do I keep the breading from falling off?
Ensure the chicken is completely dry before dredging. Use the "dry hand, wet hand" method to apply a thin, even layer of flour before the egg wash. This creates a structural bond that prevents the crust from slipping during the rendering process.
Why use baking powder in the coating?
Baking powder is alkaline, which breaks down the protein bonds in the chicken skin. It also creates microscopic carbon dioxide bubbles. These bubbles expand in the heat, creating a larger surface area and a lighter, crispier texture that mimics deep frying.
Can I make this recipe gluten-free?
Yes, replace the panko with crushed pork rinds, almond flour, or gluten-free breadcrumbs. Ensure your binding flour is a high-quality gluten-free blend. The science remains the same; the goal is to create a dry, textured exterior that can withstand high heat.
What is the best temperature for crispy chicken?
A temperature of 425 degrees Fahrenheit is ideal. This high heat triggers the Maillard reaction rapidly, browning the exterior before the internal proteins overcook. Using a lower temperature often results in steamed, rubbery skin rather than a satisfying, golden-brown crunch.