

The air outside is biting; it is the kind of cold that settles into your bones and demands a culinary counter-attack. When the sun dips below the horizon at four in the afternoon, nothing provides a sensory hug quite like the aroma of slow-simmering winter beef recipes wafting through a drafty kitchen. We are talking about deep, mahogany sauces and meat so tender it yields to the mere suggestion of a fork. This is not just cooking; it is edible architecture designed to fortify your spirit against the frost.
The beauty of these dishes lies in the transformation of humble, tough cuts into luxurious masterpieces. By the time we are done, your heavy-bottomed skillet will be a vessel of pure alchemy. We are leaning into the science of comfort, utilizing long braises and high-moisture environments to break down stubborn collagen into silky gelatin. Grab your favorite apron and a glass of bold red wine. It is time to turn your kitchen into the warmest room in the house.
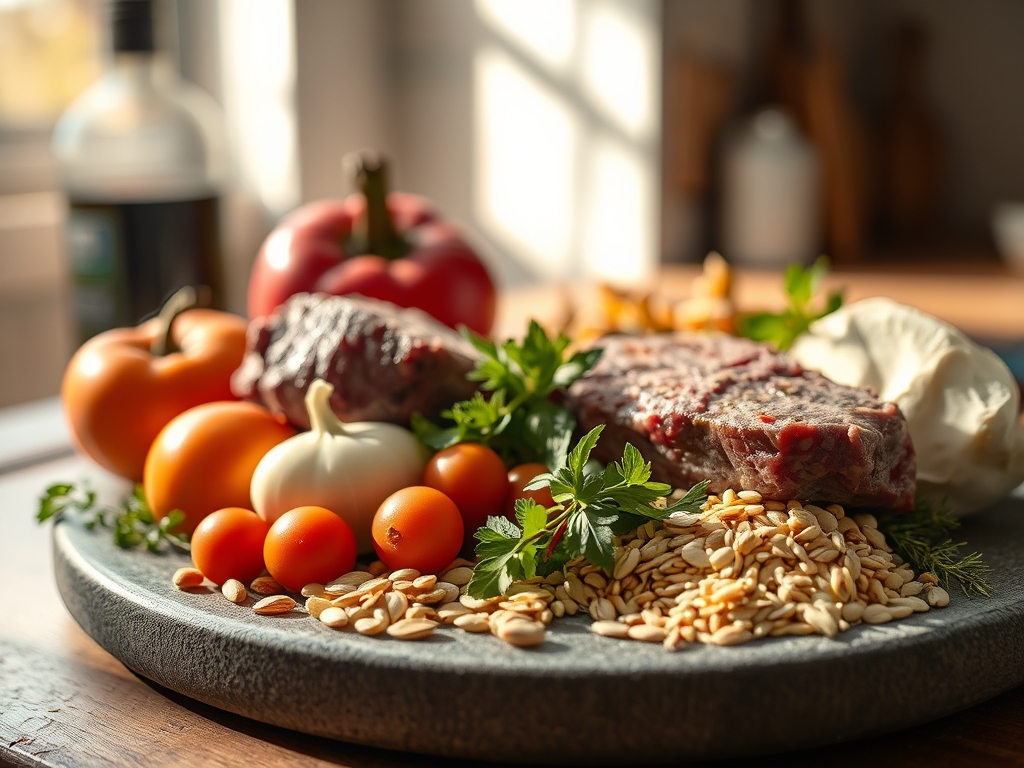
The Gathers:
To execute these winter beef recipes with precision, your mise-en-place must be impeccable. We are looking for high-quality proteins like chuck roast, short ribs, and marrow bones. These cuts contain the connective tissue necessary to create a viscous sauce that coats the back of a spoon. You will also need your aromatic trinity: onions, carrots, and celery. Use a sharp chef knife to ensure uniform cubes; this ensures even cooking and a consistent mouthfeel.
Essential pantry staples include tomato paste for umami depth, dry red wine for acidity, and high-quality beef stock. Do not forget the "brighteners" like fresh thyme, rosemary, and a head of garlic. For the finish, keep a microplane nearby to zest lemon or grate fresh horseradish.
Smart Substitutions:
If you cannot find short ribs, oxtail is a magnificent substitute that offers even more gelatinous body. For those avoiding alcohol, a mixture of beef stock and a tablespoon of balsamic vinegar provides the necessary piquant acidity to cut through the fat. If you are out of fresh herbs, use one-third the amount of dried herbs, as their oils are more concentrated. Always weigh your aromatics on a digital scale for total consistency; a medium onion can vary wildly in mass.
The Clock
Efficiency in the kitchen is about the Chef's Flow. This is the art of overlapping tasks so that no time is wasted. For these recipes, expect a "hands-on" preparation time of 45 minutes, followed by a "passive" braising time of three to four hours.
Start by searing your meat; this is the most labor-intensive part. While the beef is browning, use that time to chop your vegetables. Once the pot is in the oven, you have a three-hour window to clean your station with a bench scraper, set the table, or finally finish that book. The goal is to have a clean kitchen by the time the timer dings. Remember that beef stews actually improve after a 24-hour rest in the refrigerator; the flavors infuse and the proteins relax further.
The Masterclass
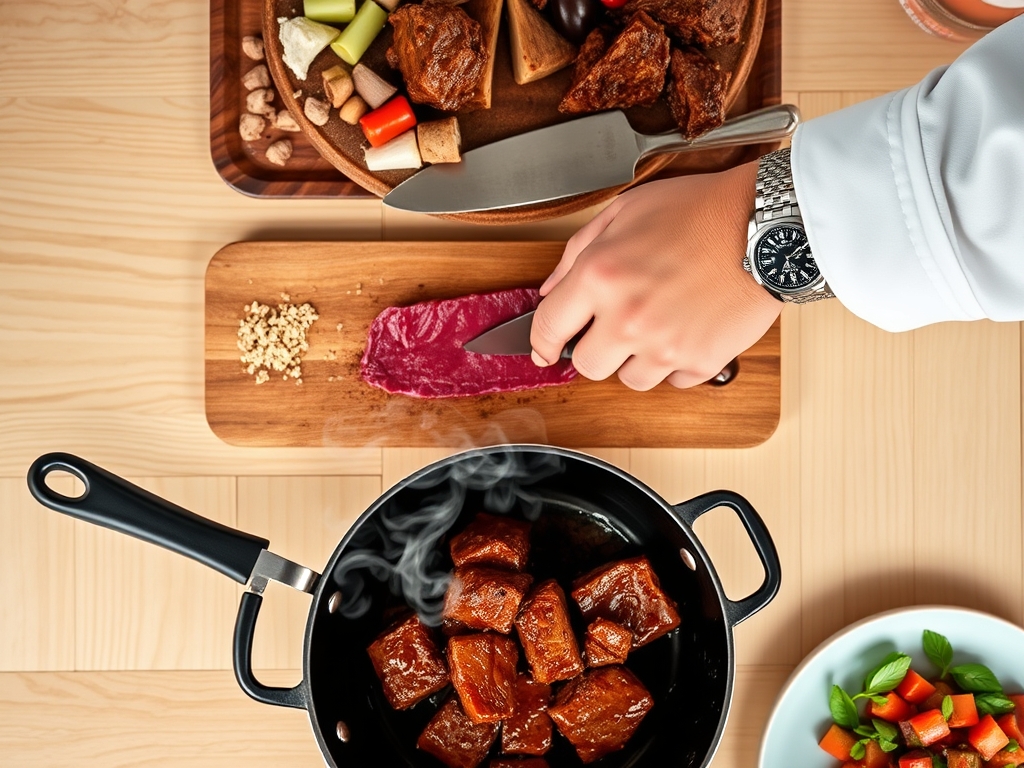
1. The Hard Sear
Pat your beef completely dry with paper towels. Moisture is the enemy of the Maillard reaction. Heat your heavy-bottomed skillet or Dutch oven until the oil shimmers. Sear the meat in batches to avoid crowding the pan, which would lower the temperature and cause the meat to steam rather than brown.
Pro Tip: This browning process creates melanoidins, complex flavor compounds that provide the savory "roasted" taste. If you skip this, your stew will lack depth and appear grey.
2. The Fond Management
Once the meat is removed, you will see brown bits stuck to the bottom. This is called the fond. Add your aromatics and use a wooden spoon to scrape these bits up. The moisture from the vegetables will help loosen them.
Pro Tip: This is deglazing. The fond contains concentrated sugars and proteins that are essential for a complex sauce. Use a saucier if you are making a smaller reduction to ensure even heat distribution.
3. The Deglaze and Emulsify
Add your liquid (wine or stock) and bring it to a simmer. Use your tongs to nestle the beef back into the liquid, ensuring it is only two-thirds submerged. This allows the exposed top to continue browning while the bottom braises.
Pro Tip: Maintaining a gentle simmer (around 190 degrees Fahrenheit) is crucial. If the liquid boils, the muscle fibers will contract and toughen, resulting in stringy meat.
4. The Long Braise
Cover the pot with a tight-fitting lid and place it in a 300-degree oven. The low, steady heat allows the collagen to slowly convert into gelatin without drying out the meat.
Pro Tip: This is hydrolysis. The slow breakdown of connective tissue is what gives the sauce its body and the meat its "melt-in-your-mouth" texture.
5. The Final Reduction
Once the meat is tender, remove it and strain the liquid. Return the liquid to the stove and simmer until it reduces by half. This concentrates the flavors and creates a velvety texture.
Pro Tip: This increases the viscosity of the sauce. For an extra glossy finish, whisk in a knob of cold butter at the very end to create a stable emulsion.
6. The Rest and Carryover
Let the meat rest in the sauce for at least 15 minutes before serving. This allows the muscle fibers to reabsorb some of the juices.
Pro Tip: Thermal carryover means the internal temperature will continue to rise slightly after removal from the heat. Pulling the pot just before the meat falls apart ensures it stays intact on the plate.
The Deep Dive
Macro Nutrition:
These dishes are high in protein and essential minerals like zinc and B12. While they are calorie-dense due to the fat content, you can lean them out by chilling the liquid and skimming the solidified fat off the top before reheating.
Dietary Swaps:
- Keto: Replace root vegetables with cauliflower or radishes; they mimic the texture of potatoes without the carbs.
- Gluten-Free: Ensure your beef stock is certified GF and use cornstarch or a potato starch slurry instead of a flour roux.
- Vegan "Beef": Use large chunks of lion's mane mushrooms or seitan, but reduce the cooking time significantly as they lack collagen.
The Fix-It:
- Too Salty? Drop in a peeled, halved potato for the last 20 minutes of cooking; it will absorb excess salt.
- Too Thin? Whisk together equal parts butter and flour (a beurre manie) and stir it into the boiling sauce.
- Too Greasy? Use a bread slice to blot the surface, or toss in a few ice cubes; the fat will cling to the cold cubes for easy removal.
Meal Prep:
When reheating, do so slowly on the stovetop. Adding a splash of water or stock helps aerate the sauce and prevents it from breaking. Microwaving often results in "rubbery" beef because it vibrates water molecules too violently.
The Wrap-Up
Mastering winter beef recipes is a rite of passage for any home cook. It requires patience, a bit of scientific understanding, and the right tools. There is something deeply satisfying about transforming raw ingredients into a dish that can stop a winter chill in its tracks. Whether you are serving a crowd or just treating yourself on a Tuesday, these techniques ensure a five-star result every single time. Now, go forth and braise!
The Kitchen Table
What is the best cut of beef for slow cooking?
Chuck roast is the gold standard. It has a high ratio of connective tissue and fat, which breaks down during long cooking cycles to create tender meat and a rich, flavorful sauce.
Can I overcook beef in a slow cooker?
Yes. While it is hard to do, eventually the muscle fibers will lose all moisture and become "mushy" or stringy. Aim for the "fork-tender" stage where the meat gives way easily but holds its shape.
Why is my stew meat tough?
It likely did not cook long enough or the temperature was too high. Collagen needs time and low heat to transform into gelatin. If it is tough, give it another thirty minutes in the oven.
Do I have to brown the meat first?
Technically no, but you should. Browning creates the Maillard reaction, which is responsible for the complex, savory flavors that define a great winter stew. Without it, the dish will taste flat.