
Imagine a heavy-bottomed skillet sizzling on the stovetop as the scent of toasted oils and sea salt fills your kitchen. We are moving beyond the basic sear today. Mastering nut crusted salmon recipes requires a delicate balance of thermal management and texture layering to achieve that elusive, shatteringly crisp exterior paired with a translucent, buttery center.
The magic happens at the intersection of fat and heat. When you press a crust of crushed pecans or pistachios onto a cold fillet, you are creating a thermal shield. This barrier allows the fish to reach its ideal internal temperature without the delicate proteins tightening into a dry, chalky mess. It is high-stakes chemistry disguised as a weeknight dinner; a dance of Maillard reactions and moisture retention that turns a simple piece of seafood into a five-star centerpiece. Whether you are hosting a formal gala or just treating yourself to a solo feast, these seven variations will redefine your relationship with the oven.
The Gathers:
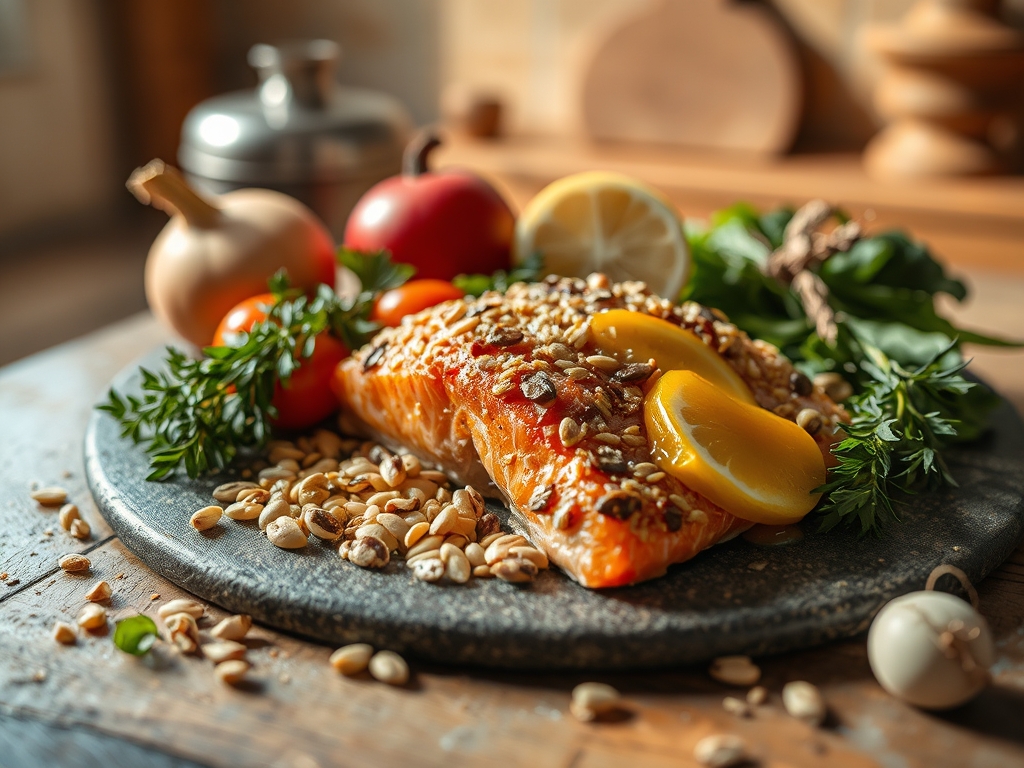
To execute these nut crusted salmon recipes with precision, your mise-en-place must be impeccable. Start with the salmon itself; look for King or Sockeye fillets with high intramuscular fat. You will need a variety of nuts: buttery macadamias, earthy walnuts, and vibrant pistachios. Use a digital scale to measure your dry ingredients, as volume can be deceptive when dealing with varying crumb sizes.
The binding agent is your glue. A viscous Dijon mustard or a honey-miso glaze works best. You will also need aromatics: fresh dill, lemon zest, and perhaps a pinch of smoked paprika. For the tools, ensure you have a microplane for zesting, a heavy-bottomed skillet or a rimmed baking sheet, and a sharp chef's knife to hand-chop the nuts. Avoid the food processor if possible; you want irregular, jagged pieces to maximize surface area for browning.
Smart Substitutions:
If you are allergic to tree nuts, toasted pumpkin seeds (pepitas) or sunflower seeds offer a similar crunch and high oil content. For a vegan binder, a flax-meal slurry provides the necessary adhesion without altering the flavor profile. If you lack Dijon, a thin layer of Greek yogurt offers a piquant acidity that tenderizes the fish as it bakes.
The Clock
Efficiency in the kitchen is about "Chef's Flow." This is the art of overlapping tasks so no heat is wasted. Prep time for these recipes is a brisk 15 minutes, primarily spent on chopping and zesting. The cooking time varies between 10 to 14 minutes depending on the thickness of your fillets.
The flow is simple: preheat the oven while you prepare the crust. While the salmon rests after cooking, you have a 5-minute window to whisk together a quick pan sauce or toss a light arugula salad. Total time from fridge to table is under 30 minutes. Using a digital thermometer ensures you never overstay the welcome of the heat; pull the fish at 125 degrees Fahrenheit for a perfect medium-rare finish after thermal carryover.
The Masterclass
1. The Prep and Pat
Start by patting the salmon fillets bone-dry with paper towels. Moisture is the enemy of the sear. If the surface is damp, the heat will spend its energy evaporating water rather than browning the crust.
Pro Tip: This is known as preventing "steaming." By removing surface moisture, you ensure the Maillard reaction begins the moment the fish hits the heat, resulting in a deeper flavor profile.
2. The Binder Application
Use a pastry brush to apply a thin, even layer of your binder (mustard, honey, or mayo) to the top of the fillet. You want it to be tacky, not dripping.
Pro Tip: The binder acts as an emulsifier. It bridges the gap between the lean protein of the fish and the fat-rich nuts, ensuring the crust stays attached during the flipping or plating process.
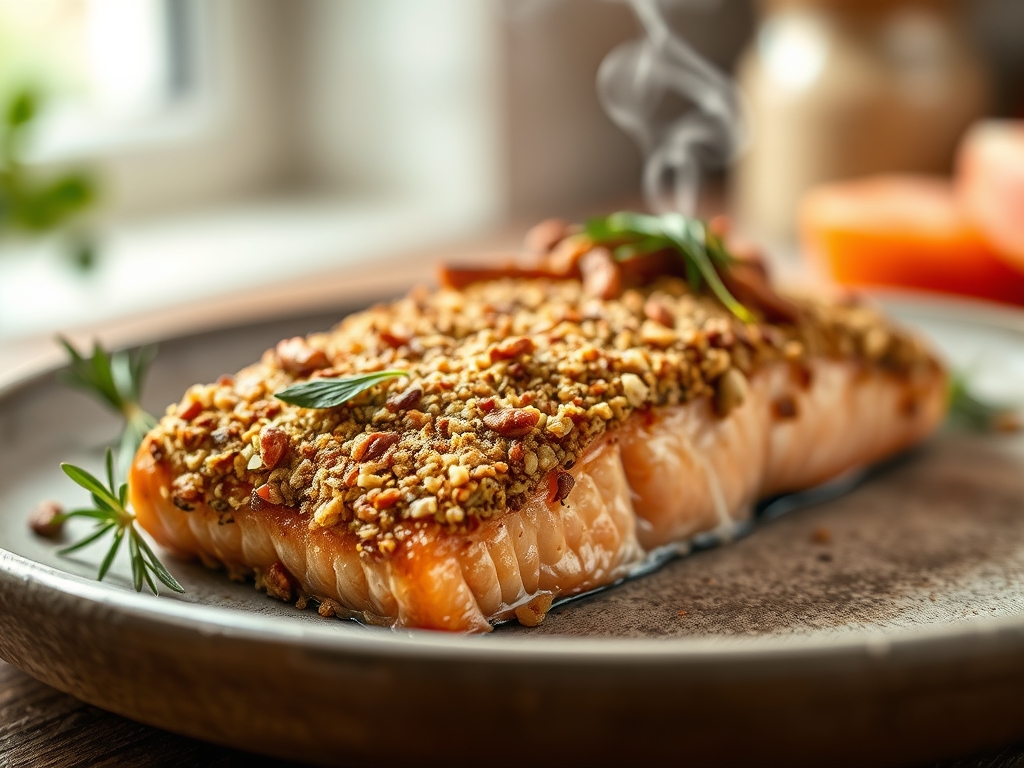
3. The Nut Compression
Press the nut mixture firmly onto the binder. Use the flat side of a bench scraper or your palm to ensure the nuts are embedded.
Pro Tip: Compression increases the density of the crust. A denser crust provides better insulation, protecting the delicate omega-3 fatty acids from oxidizing under high heat.
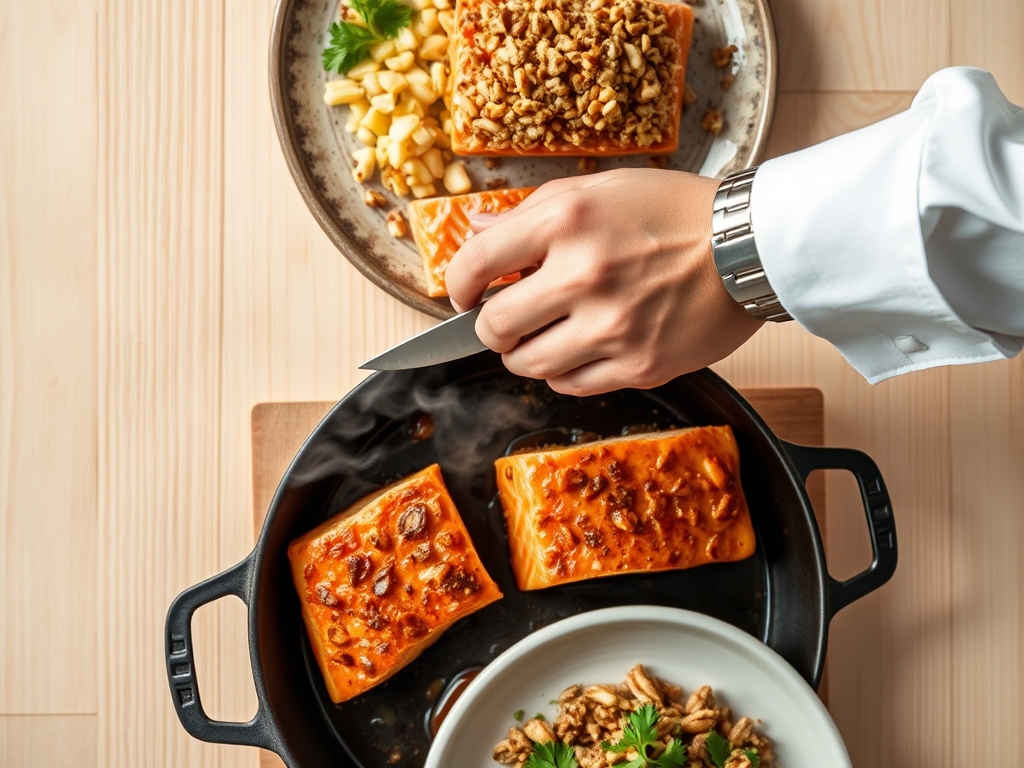
4. The Searing Phase
If using a skillet, place the salmon crust-side down in a hot pan with a neutral oil. Sear for 2 to 3 minutes until the nuts are golden.
Pro Tip: This is enzymatic browning. The oils within the nuts are being released and toasted, which creates a complex, savory aroma that raw nuts simply cannot provide.
5. The Oven Finish
Transfer the skillet to a preheated oven at 400 degrees Fahrenheit. This ambient heat will cook the interior of the fish evenly.
Pro Tip: Using a heavy-bottomed skillet ensures even heat distribution, preventing "hot spots" that could burn the nuts while the center of the salmon remains raw.
6. The Temperature Check
Use your digital thermometer to check the thickest part of the fillet. Aim for 125 to 130 degrees Fahrenheit.
Pro Tip: Thermal carryover will continue to raise the internal temperature by 5 degrees after you remove it from the heat. Pulling it early prevents the protein fibers from contracting and squeezing out the juices.
7. The Rest and Infuse
Let the salmon rest on a warm plate for 3 to 5 minutes before serving. This allows the juices to redistribute.
Pro Tip: Resting allows the viscous juices to settle back into the flakes of the fish. If you cut it immediately, the moisture will flood the plate, leaving the salmon dry.
The Deep Dive
Macro Nutrition: Nut crusted salmon is a powerhouse of healthy fats. You are getting high-quality protein from the fish and monounsaturated fats from the nuts. Expect roughly 35g of protein and 22g of fat per serving, with minimal carbohydrates.
Dietary Swaps: For a Keto version, ensure your binder is sugar-free (no honey). For a Gluten-Free crust, ensure your nuts are not processed in a facility with wheat. To make it Vegan, use a thick cauliflower "steak" or firm tofu as the base, following the same crusting techniques.
The Fix-It:
- Crust Falling Off: Your binder was too thin or the nuts were chopped too large. Next time, finely mince the nuts and ensure the fish is bone-dry before applying the glue.
- Burnt Nuts, Raw Fish: The heat was too high. Lower the oven temperature and use a saucier to spoon warm butter over the crust to distribute heat more gently.
- Soggy Bottom: You likely crowded the pan. Give the fillets space so the air can aerate around them, or use a wire rack set over a baking sheet.
Meal Prep: To reheat, avoid the microwave. Use a toaster oven at 300 degrees Fahrenheit for 5 minutes. This preserves the "day-one" crunch of the nuts without overcooking the salmon.
The Wrap-Up
You are now equipped to dominate the kitchen with these nut crusted salmon recipes. It is a dish that looks like a million bucks but relies on simple, sound scientific principles. Remember to trust your tools; let the thermometer be your guide and the skillet be your stage. Go forth, get that perfect sear, and show those fillets who is boss!
The Kitchen Table
How do I keep the nut crust from getting soggy?
Ensure the salmon is patted completely dry before adding the binder. Use a wire rack on a baking sheet to allow hot air to circulate under the fish, preventing steam from softening the bottom of the crust.
What is the best nut for a salmon crust?
Pistachios and walnuts are top choices due to their high oil content and structural integrity. Pistachios offer a vibrant color and mild sweetness, while walnuts provide an earthy, robust crunch that pairs well with maple or honey.
Can I use frozen salmon for nut crusted recipes?
Yes, but it must be fully thawed and dried. Frozen fish releases more moisture as it cooks, so consider flash-searing the crust in a pan before finishing in the oven to ensure maximum crispness.
How do I know when the salmon is done without a thermometer?
The fish should be opaque and flake easily with a fork. However, for professional results, a thermometer is essential. Look for the "white pearls" of albumin just starting to appear on the sides of the fillet.